Showing posts with label Tutorials. Show all posts

Saturday, January 12, 2008

NetBeans and JacORB

Today I'd like to show you how you can run your first CORBA application in NetBeans 6.0 without any additional IDE-Plugins but don't expect a CORBA tutorial because this would be an issue for more than one blog post. Besides you will find a really good and detailed documentation in your JACORB_HOME\doc directory. First of all I'd like to provide the links where you can find all necessary resources for this tutorial.

Resources:

Requirements:

  • Java SDK ;-)
  • Installed NetBeans IDE
  • Added JACORB_HOME to your system-properties

I will use a demo application (grid) which you will find in the JACORB_HOME\demo directory. Because I only want to show you how to bring your CORBA installation up and running I won't implement an application from scratch. After you have prepared all configurations it would be very easy for you to implement a new Java application. So let's start by creating a new Java-Project in your NetBeans IDE. I simply called it 'Grid'. Now you have to add all the necessary JacORB-libraries which you will find under JACORB_HOME\lib into your IDE and add it to your project's classpath.

Necessary Libraries:

  • avalon-framework-4.1.5.jar
  • jacorb.jar
  • idl.jar
  • logkit-1.2.jar

The next step is to create the necessary java-packages ('demo.grid') for the demo-application and then simply copy the demo-app's sources to the demo.grid package.
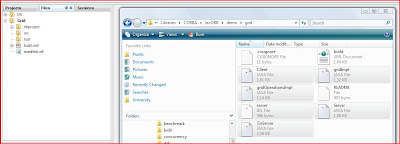

Files to copy:

  • Client.java
  • Server.java
  • TieServer.java
  • gridImpl.java
  • gridOperationsImpl.java
  • server.idl

After you've copied all the necessary files, create a new folder in your project, I called it 'cust'. Download and save the following file into this new folder. This file is a custom ant-build.xml file for your application. It provides targets e.g. to start the namespaces-server, to invoke the idl-compiler pointing to your server.idl which will generate all necessary stub-classes for the corba-application.

Build.xml

I've changed the module structure in the sever.idl file by adding a new module (which will be a generated java-package) called 'gen'. That's because I'd like to have the generated artefacts in a separated package.

server.idl:

module gen {
module demo
{
module grid
{
interface MyServer
{
typedef fixed <5,2> fixedT;
readonly attribute short height; // height of the grid
readonly attribute short width; // width of the grid

// set the element [n,m] of the grid, to value:
void set(in short n, in short m, in fixedT value);

// return element [n,m] of the grid:
fixedT get(in short n, in short m);


exception MyException { string why; };

short opWithException() raises( MyException );
};
};
};};

The following picture shows how your folder-structure should now look like.
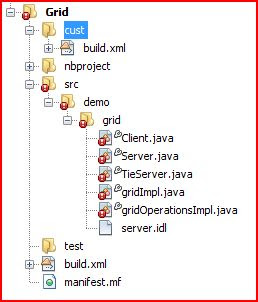


Now, open your custom build.xml and run the 'idl-compile' target in the navigator-view of your IDE. This will compile your server.idl and generate all necessary stub-classes to run your application. Your application should still have some errors. That's because we've changed the server.idl and hence the java-package structure and all the dependencies of your java-files can't be resolved because they aren't pointing to gen.demo.grid. You will be able to solve those errors by open up each java-file and press Ctrl+Shift+I to fix all imports.

You now should still have some errors. That's because some packages have been hardcoded in the demo-application. Just rename those packages from demo.grid to gen.demo.grid. Then there should be no errors anymore and you will be able to run the application and those are the steps to complete this tutorial:

  1. run compile target
  2. run run-ns target
  3. run run-grid-server target
  4. run run-grid-client target

Then you should see something like the following screen shows:
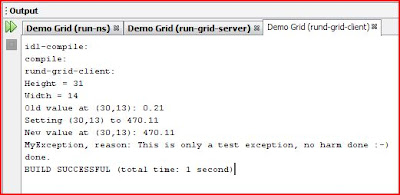

From here this is a good starting point to go through the JacORB's documentation and study all the demo app's sources. Then you will have a pretty good understanding on how CORBA works. Of course CORBA is a pretty complex technology but there are many more demo applications which you will find under the JACORB_HOME\demo directory. So enjoy coding CORBA apps with NetBeans IDE.

Cheers

Monday, December 10, 2007

How to blog with MS Word 2007

In this post I'd like to show you how to use MS Word 2007 as a Client for your Blog-Posts. First of all you need three things:

  1. A functional blog. I use Blogger
  2. Webspace for pictures. Blogger interacts very smoothly with Picasa
  3. And of course MS Word 2007 as a Client.

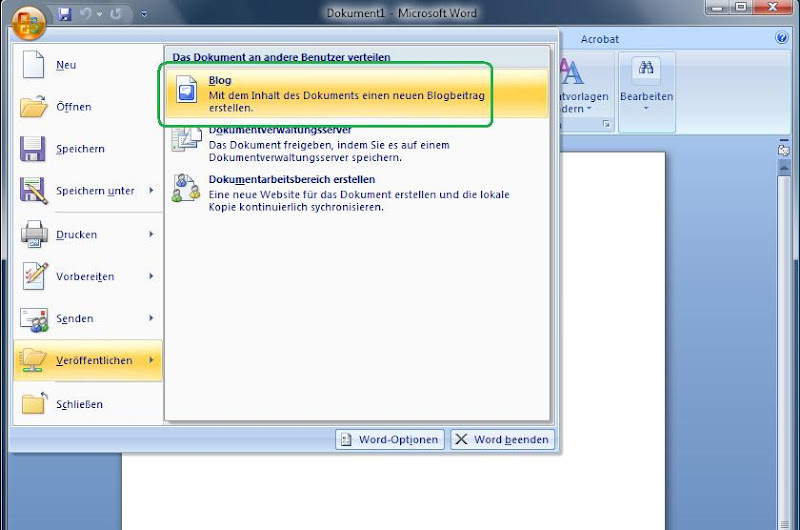
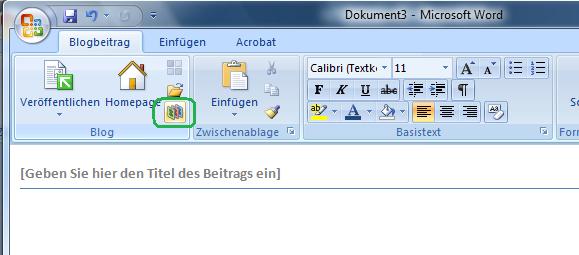
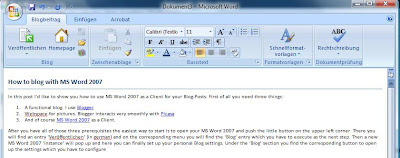
After you have set up all of those three prerequisites the easiest way to start is to open your MS Word 2007 and push the little button on the upper left corner. There you will find an entry 'Veröffentlichen' and on the corresponding menu you will find the 'Blog' entry which you have to execute as the next step. Then a new MS Word 2007 'instance' will pop up and here you can finally set up your personal Blog settings. Under the 'Blog' section you will find the corresponding button to open up the settings which you have to configure. The following screenshots show how you can easily click you through the settings and after configuring all you'll be able to use Word as a client.

Push the button on the upper left corner.


This button is necessary for your blog settings.


If you haven't already configured your blog do so by pushing the 'New' button.


Chose your Blog provider. ( I've chose Blogger)


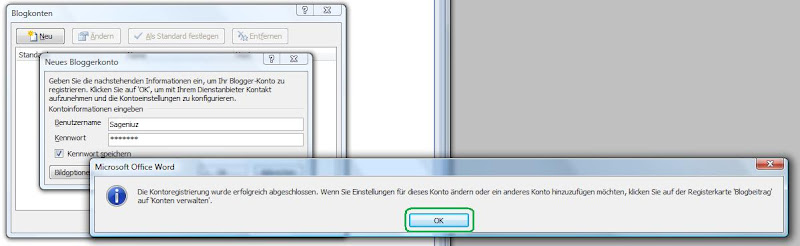
Enter your blog's login-credentials.


If you have a supported picture provider chose it and click next.


If you have already more than one blog select the one you would like to configure in Word.


Click ok. This is just a confirmation dialog which says that you have successfully configured you blog.


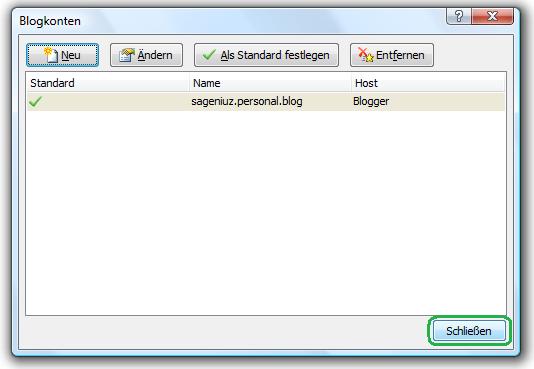
Now you should be able to see your configured blog.


Now blog with MS Word 2007 as a client.


PICASA and how to use it's pictures in MS Word 2007 within a blog-post.

A very interesting thing I'd like to show you in the next step is how you will be able to use pictures from Picasa within Word after you have already uploaded those pictures which you would like to use in your blog-post. So as I said you have to upload all pictures and if you have done so to your online web album of your Picasa web space then do the following:

  1. Open the picture you would like to use.
  2. Click on the 'Link to this Photo' link.
  3. Select the size of the picture which you'd like to have your picture shown on you blog.

The copied link will look something like this:

<a href="http://picasaweb.google.com/Sageniuz/HowToBlogWithMSWord2007/photo?authkey=PQ1-4utD-0M#5142340762644508850"><img src="http://lh6.google.com/Sageniuz/R11Dradv8LI/AAAAAAAABHc/HCGQFYLCLA0/s144/01.jpg" /></a>

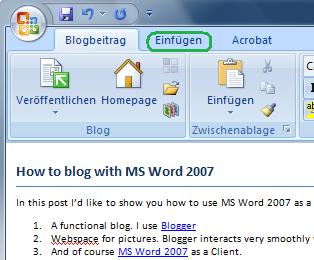
You only will need the: http://lh6.google.com/Sageniuz/R11Dradv8LI/AAAAAAAABHc/HCGQFYLCLA0/s144/01.jpg part of the copied link or better you only copy this part of the link. The next step is to select the 'Einfügen'-tab in MS Word 2007 and click on the 'Grafik' button. A new dialog will pop up and now you have to paste the copied part of you picasa-link into the 'Einfügen' input field. After you have done this you have to select the 'Einfügen u. Verknüpfen' section in the selection bar to left of the 'Abbrechen' button. After a few seconds the picture of picasa will be referenced to you MS Word 2007 client.

Select picture.


Go to 'Einfügen' tab.


Push 'Grafik' button to paste your picture.


Paste the link to your picture.


Select 'Einfügen u. Verknüpfen'.


Now the picture will be in your blog-post within Word.


So, I hope you liked this little tutorial and it will help you to improve your 'blog-speed', too. Although there is a time delay while inserting pictures in Word from Picasa I like all the Word features better than the integrated editor within Blogger. Moreover you can save posts locally on your pc and if you don't have an internet-connection you will be able to write blog posts and upload them a little later.

Cheers

Saturday, December 08, 2007

NetBeans 6.0 | A little JPA Example

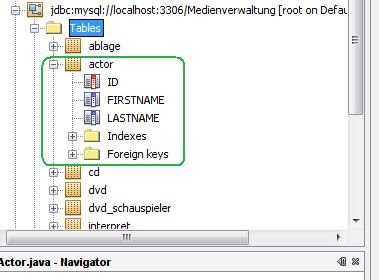
In this post I'd like to show you how to use JPA in NetBeans within a Java SE application. First of all you have to create a database and call it something like TestDB. I called my database 'Medienverwaltung' because I did a small JPA-tutorial from the new Javamagazin which had exactly the same database.


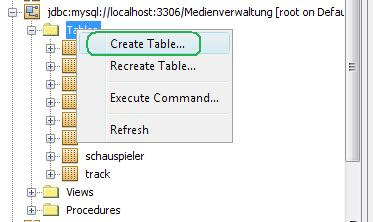
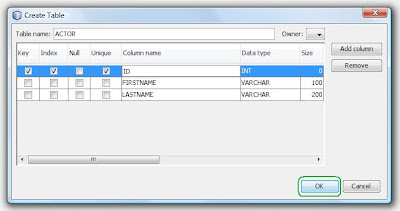
Create a very simple table without any references on other tables and call it 'ACTOR'. That's all you need for a first little JPA test. Now, create a JavaApplication in NetBeans. I called my application 'JPAGenTest'.


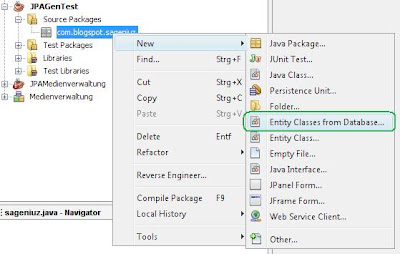
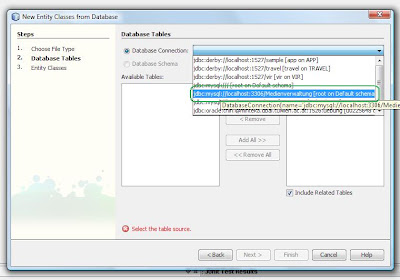
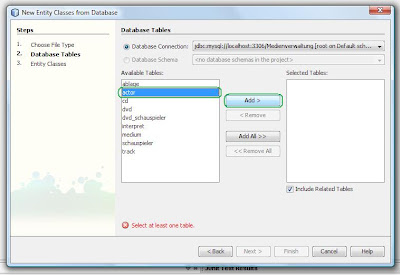
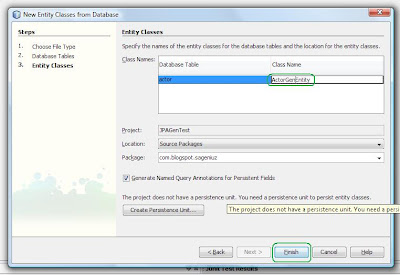
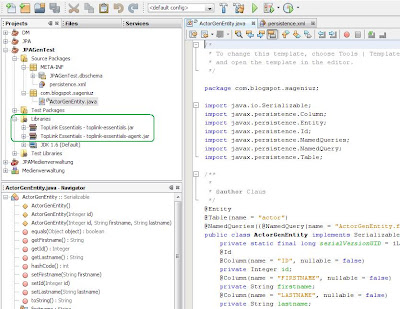
The next step is to generate an Actor-Entity-Class which will map the data into the corresponding 'ACTOR'-table in your database. A lot of errors will show up. That's because the necessary libraries are still missing.


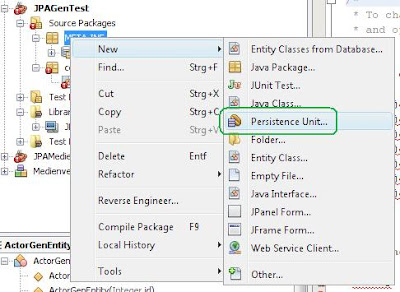
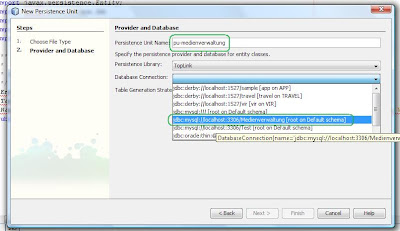
You can import them by configure your libriaries within the IDE or you create the persistent-unit and the libs will be imported automatically. You have to create this persistent unit anyway so I've decided to create it to import the missing libs.


Now all errors are gone and you will be able to create more JPA functionality. The next step is to implement a Manager-Class which handles the JPA persistence-context. That means this class is responsible to provide CRUD functionality for your actor-instances and to communicate with your database.


I've named this kind of class 'ActorManager' and implemented the following typically methods to interact with my database:
  • createActor
  • findById
  • findByFirstname (NamedQuery)
  • findByLastname (NamedQuery)
  • updateActor
  • removeActor
  • getAll
  • removeAll

NamedQuery is a JPA-Feature which was automatically created by NetBeans when you've created your Enitity-Class. It's a simple JPQL statement which usually will be used more often in your application.

Here is the code from the ActorManager:


package com.blogspot.sageniuz;

import java.util.Iterator;
import java.util.List;
import javax.persistence.EntityManager;
import javax.persistence.EntityManagerFactory;
import javax.persistence.Query;

/**
* Actor-Manager
* @author Claus Polanka
*/
public class ActorManager {

private EntityManager em;

public ActorManager(EntityManagerFactory emf) {
em = emf.createEntityManager();
}

public void createActor(ActorGenEntity actor) {
em.getTransaction().begin();
em.persist(actor);
em.getTransaction().commit();
}

public ActorGenEntity findById(Integer id) {
return em.find(ActorGenEntity.class, id);
}

public List findByFirstname(String firstname) {
Query query = em.createNamedQuery("ActorGenEntity.findByFirstname");
query.setParameter(firstname, em);
List listOfActors = query.getResultList();
return listOfActors;
}

public List findByLastname(String lastname) {
Query query = em.createNamedQuery("ActorGenEntity.findByLastname");
query.setParameter(lastname, em);
List listOfActors = query.getResultList();
return listOfActors;
}

public void updateActor(ActorGenEntity actor) {
em.getTransaction().begin();
em.merge(actor);
em.getTransaction().commit();
}

public void removeActor(ActorGenEntity actor) {
em.getTransaction().begin();
em.remove(actor);
em.getTransaction().commit();
}

public List getAll() {
Query query = em.createQuery("select a from ActorGenEntity a");
List list = query.getResultList();
return list;
}

public void removeAll() {
em.getTransaction().begin();
Query query = em.createQuery("select a from ActorGenEntity a");
List list = query.getResultList();
Iterator it = list.iterator();
while (it.hasNext()) {
ActorGenEntity actor = it.next();
em.remove(actor);
}
em.getTransaction().commit();
}

public void close() {
em.close();
}
}


Testing the application is the next thing to do, so let's create a JUnit test-clase. Before you start implementing it check if you have already imported you database-driver or you will get an exception when executing your JUnit-test.


Here is the code for my test-class:


package com.blogspot.sageniuz;

import java.util.List;
import javax.persistence.EntityManager;
import javax.persistence.EntityManagerFactory;
import javax.persistence.Persistence;
import junit.framework.TestCase;

/**
* CRUD Test for Actor-Class.
* @author Claus Polanka
*/
public class TestActorManager extends TestCase {

private ActorManager am;
private EntityManager em;
private EntityManagerFactory emf;

private static final ActorGenEntity TESTACTOR1 = new ActorGenEntity(1, "Claus", "Polanka");
private static final ActorGenEntity TESTACTOR2 = new ActorGenEntity(2, "Barbara", "Ebinger");
private static final ActorGenEntity TESTACTOR3 = new ActorGenEntity(3, "Irene", "Polanka");

public TestActorManager(String testName) {
super(testName);
}

@Override
protected void setUp() throws Exception {
emf = Persistence.createEntityManagerFactory("pu-medienverwaltung");
em = emf.createEntityManager();
am = new ActorManager(emf);
}

@Override
protected void tearDown() throws Exception {
am.close();
em.close();
emf.close();
}

public void testCRUD() {
am.createActor(TESTACTOR1);
ActorGenEntity actor = am.findById(1);
assertEquals(actor.getFirstname(), "Claus");

actor.setFirstname("Barbara");
am.updateActor(actor);

actor = am.findById(1);
assertEquals(actor.getFirstname(), "Barbara");

am.createActor(TESTACTOR2);
am.createActor(TESTACTOR3);

List list = am.getAll();
assertEquals(list.size(), 3);

am.removeAll();
list = am.getAll();
assertEquals(list.size(), 0);
}
}

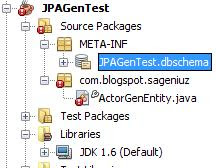
The following picture shows my project-tree and how your project-structure should also look like.


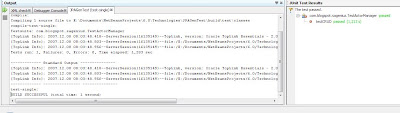
After running your test you should see something like the following.


In the next days I will test more of the JPA features like support for derived Entities and stuff like that.

Cheers
Wednesday, November 21, 2007

How 2 Test PL/SQL with Oracle 10g | Part 1

In this post I'm going to show you how to test simple PL/SQL queries on an Oracle 10g database. Because this year I focus on databases I've decided to attend 'Database Management Systems' which is a lecutre at my university.
This lecture or better the responsible institute provides an Oracle 10g database for all students who'd like to complete the corresponding exercise. Here is the description of the first exercise. I had to design a (small) complete database including EER-Diagram, relations, CREATE TABLE, DROP TABLE and INSERT INTO statements.

So, if you already have designed the EER-Diagram and corresponding database-relations you have to implement the necessary sql-files and execute them on the server which is provided by the lecture's institute. I focus on showing you how to test under Windows Vista.

The first step I had to do I had to download a ssh-client for my OS to connect to the universities' server. I chose Putty because I'm a experienced on using this client. After I've successfully installed Putty I tried to connect to the server by opening a new session.


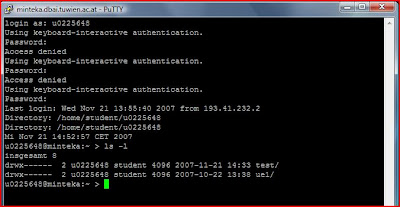
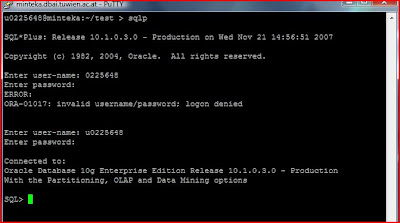
I've entered my creds and finally I successfully was connected.


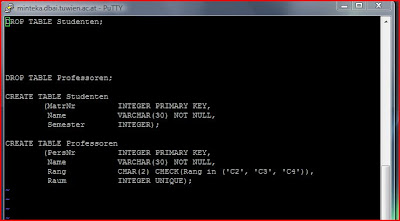
Then I've create a test directory where I wrote my first create_table.sql file with vim.


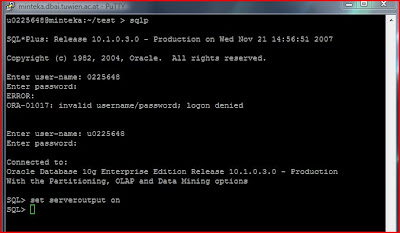
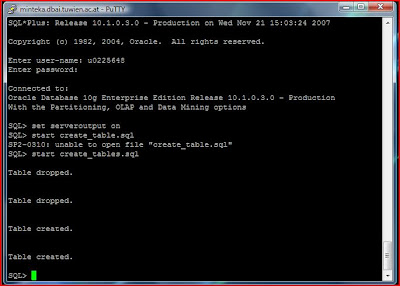
In the next step I've started a new Putty-Connection to run the table script by entering 'slqp' on the command-line. Again I had to enter my creds for this SQLPlus session.


The first command which you should enter is the 'SET SERVEROUTPUT ON' command to get the corresponding output of the server after you have executed a query.


Then I've testet my create_table.sql file by typing 'start PATH_TO_FILE/create_table.sql'. If your sql-file successfully executed you can type 'exit' to exit the SQLPlus session.


To be continued ...

Monday, November 12, 2007

RMI with NetBeans 6 Beta 2

Please don't let mislead you because of this post's title. NetBeans doesn't have any special features for RMI support. I've only chosen this title because I'm going to develop my RMI-Service in NetBeans 6 Beta 2 which is my favourite IDE.

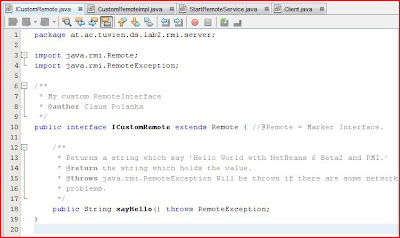
I won't explain every detail of RMI because you will find a lot of good tutorials on the web anyway. So, the first step is to open your IDE and develop the Interface for your RemoteService:


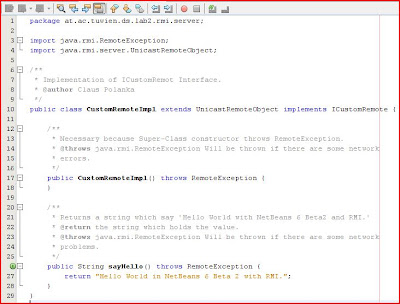
Second step: Write your service implementation class.


package at.ac.tuwien.ds.lab2.rmi.server;

import java.rmi.RemoteException;
import java.rmi.server.UnicastRemoteObject;

/**
* Implementation of ICustomRemot Interface.
* @author Claus Polanka
*/
public class CustomRemoteImpl extends UnicastRemoteObject implements ICustomRemote {

/**
* Necessary because Super-Class constructor throws RemoteException.
* @throws java.rmi.RemoteException Will be thrown if there are some network
* errors.
*/
public CustomRemoteImpl() throws RemoteException {
}

/**
* Returns a string which say 'Hello World with NetBeans 6 Beta2 and RMI.'
* @return the string which holds the value.
* @throws java.rmi.RemoteException Will be thrown if there are some network
* problems.
*/
public String sayHello() throws RemoteException {
return "Hello World in NetBeans 6 Beta 2 with RMI.";
}
}


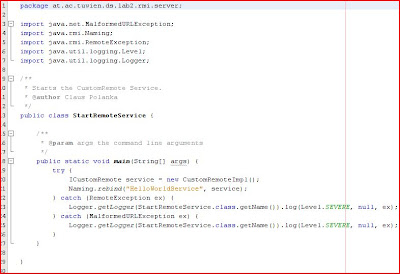
Next step ist to implement a class who starts your remote service:


package at.ac.tuwien.ds.lab2.rmi.server;

import java.net.MalformedURLException;
import java.rmi.Naming;
import java.rmi.RemoteException;
import java.util.logging.Level;
import java.util.logging.Logger;

/**
* Starts the CustomRemote Service.
* @author Claus Polanka
*/
public class StartRemoteService {

/**
* @param args the command line arguments
*/
public static void main(String[] args) {
try {
ICustomRemote service = new CustomRemoteImpl();
Naming.rebind("HelloWorldService", service);
} catch (RemoteException ex) {
Logger.getLogger(StartRemoteService.class.getName())
.log(Level.SEVERE, null, ex);
} catch (MalformedURLException ex) {
Logger.getLogger(StartRemoteService.class.getName())
.log(Level.SEVERE, null, ex);
}
}

}


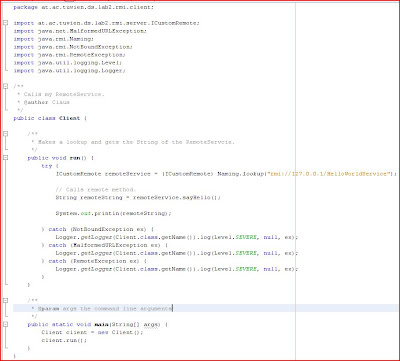
Now, after you have finished the serverside of your RMI application, it's time to develop the client who calls the service.


package at.ac.tuwien.ds.lab2.rmi.client;

import at.ac.tuwien.ds.lab2.rmi.server.ICustomRemote;
import java.net.MalformedURLException;
import java.rmi.Naming;
import java.rmi.NotBoundException;
import java.rmi.RemoteException;
import java.util.logging.Level;
import java.util.logging.Logger;

/**
* Calls my RemoteService.
* @author Claus Polanka
*/
public class Client {

/**
* Makes a lookup and gets the String of the RemoteServcie.
*/
public void run() {
try {
ICustomRemote remoteService = (ICustomRemote)
Naming.lookup("rmi://127.0.0.1/HelloWorldService");

// Calls remote method.
String remoteString = remoteService.sayHello();

System.out.println(remoteString);

} catch (NotBoundException ex) {
Logger.getLogger(Client.class.getName()).log(Level.SEVERE, null, ex);
} catch (MalformedURLException ex) {
Logger.getLogger(Client.class.getName()).log(Level.SEVERE, null, ex);
} catch (RemoteException ex) {
Logger.getLogger(Client.class.getName()).log(Level.SEVERE, null, ex);
}
}

/**
* @param args the command line arguments
*/
public static void main(String[] args) {
Client client = new Client();
client.run();
}
}


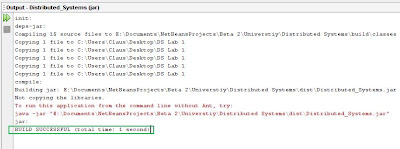
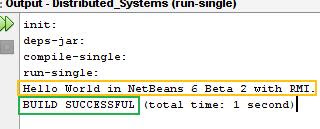
Now, compile everything and you should see something like the following output:


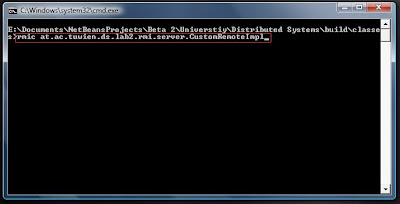
So, if you have the same environment as I have (only one machine ;-) you don't have to copy anything to another location. Just generate the Service Stub-Class, start the rmiregistry and start your service. Then your client should be able to execute the Service and print out it's result which is in my case a simple string.

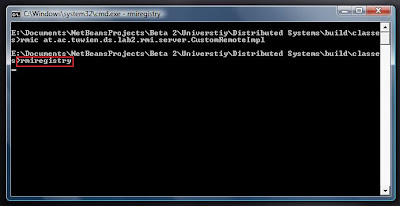
Generate Stub-Class:


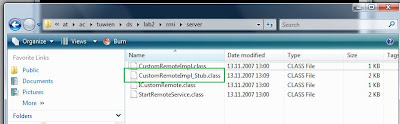
Now, you should be able to see a new generated class in corresponding package where you have generated the Stub.


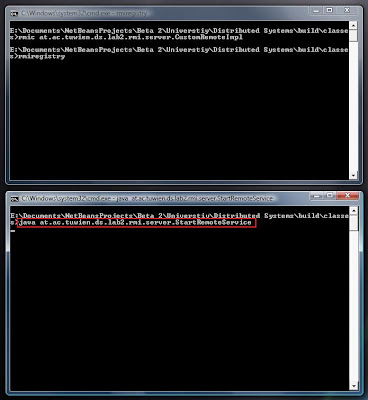
Start the RMI-Registry to register the Service.


Start your service and bind it to your registry.


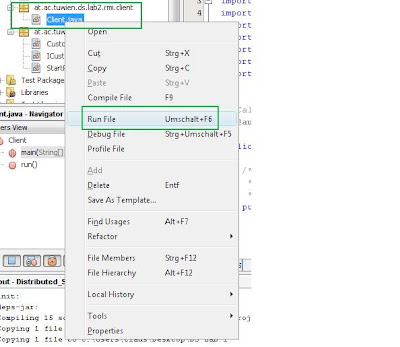
Let's run the Client.


And see the result.


Hope you liked it.

Cheers