Showing posts with label Programming. Show all posts

Wednesday, November 21, 2007

How 2 Test PL/SQL with Oracle 10g | Part 1

In this post I'm going to show you how to test simple PL/SQL queries on an Oracle 10g database. Because this year I focus on databases I've decided to attend 'Database Management Systems' which is a lecutre at my university.

This lecture or better the responsible institute provides an Oracle 10g database for all students who'd like to complete the corresponding exercise. Here is the description of the first exercise. I had to design a (small) complete database including EER-Diagram, relations, CREATE TABLE, DROP TABLE and INSERT INTO statements.

So, if you already have designed the EER-Diagram and corresponding database-relations you have to implement the necessary sql-files and execute them on the server which is provided by the lecture's institute. I focus on showing you how to test under Windows Vista.

The first step I had to do I had to download a ssh-client for my OS to connect to the universities' server. I chose Putty because I'm a experienced on using this client. After I've successfully installed Putty I tried to connect to the server by opening a new session.
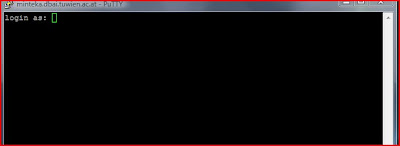


I've entered my creds and finally I successfully was connected.
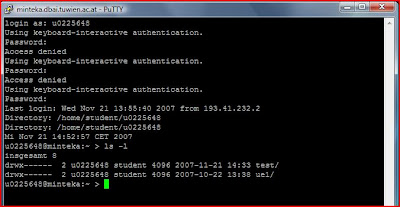


Then I've create a test directory where I wrote my first create_table.sql file with vim.
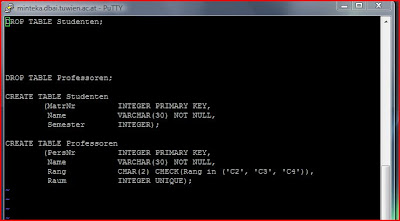


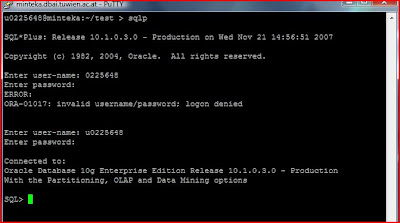
In the next step I've started a new Putty-Connection to run the table script by entering 'slqp' on the command-line. Again I had to enter my creds for this SQLPlus session.


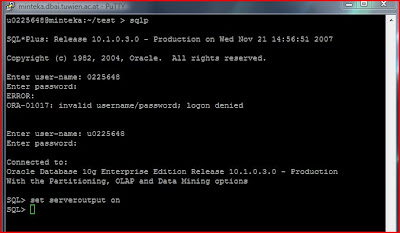
The first command which you should enter is the 'SET SERVEROUTPUT ON' command to get the corresponding output of the server after you have executed a query.


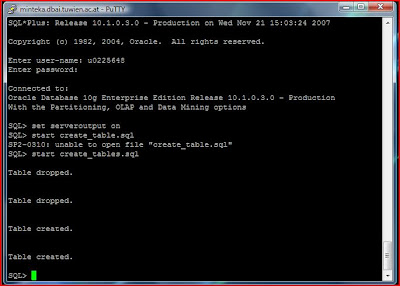
Then I've testet my create_table.sql file by typing 'start PATH_TO_FILE/create_table.sql'. If your sql-file successfully executed you can type 'exit' to exit the SQLPlus session.


To be continued ...
Sunday, November 11, 2007

Foreign Keys in Derby with NetBeans 6 Beta 2

Although NetBeans 6 Beta 2 provides several convenient tools for working with databases it was not possible to create a table and set foreign keys without using SQL statements.

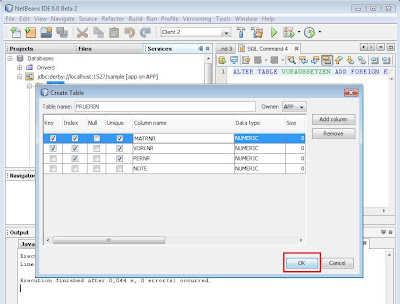
So how did I set those foreign keys in my tables using the integrated Derby database which comes out fo the box with Netbeans. So first of all I've created my tables using the 'Create Table' tool of NetBeans by right clicking my 'Tables' folder of a connected database and execute the 'Create Table...' command.


Then you will be able configure you table by editing your table scheme. In my case I have a 'PRUEFEN' table which represents a relation between students (N), lectures (N) and teachers (1) so I have three foreign keys: MATRNR (students), VORLNR (lectures) and PERNR (teachers) but you won't be able to set those foreign keys with this database tool.


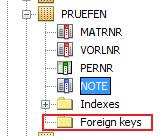
So, after clicking the 'OK' button your table will be created but no foreign keys will be set. If you click on your foreign keys folder in your table structure you won't find any. So, you have to additionally add them by executing the corresponding SQL ALTER statements.


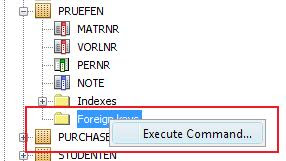
Right click your foreign keys folder and press the 'Execute Statement...' command.


Then type the following command: ALTER TABLE PRUEFEN ADD FOREIGN KEY(MATRNR) REFERENCE STUDENTEN; as you can see in the next picture and run the command by clicking the little run-button which you can find over the sql statement.


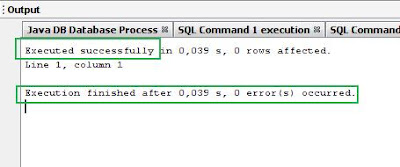
So, if there are no errors you should see something like the following screen shows in your output window.


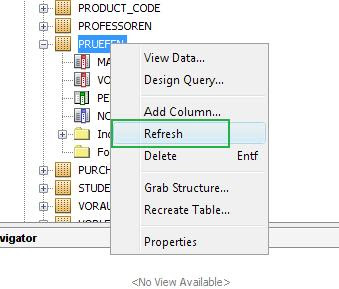
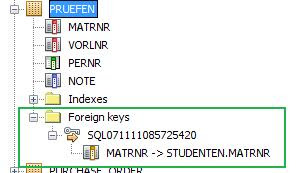
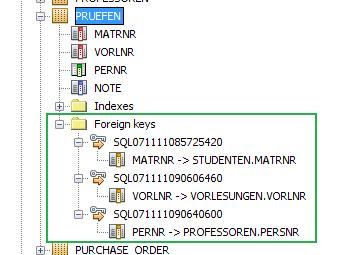
Then you have to refresh your table by right clicking it and press the 'Refresh' button. Now you should be able to see the new foreign key reference. You have to repeat this approach for every foreign key in your table.


Finally you should have successfully configured all foreign keys but hold on I've found a little mistake in my table: PERNR should be renamed to PERSNR. But this is the topic of my next post tomorrow: How to rename columns in Derby within NetBeans.

Goold night and I hope this tutorial can help you to design your database tables.

Cheers

C over a Terminal in Gutsy Gibbon

Today I'd like to show you how to write an 'Hello World' application in C language under Ubuntu 7.10 Codename Gutsy Gibbon over a terminal without using an IDE.

If you have the same version of Ubuntu (VMWare Image) as I have then you have the newest version of the GNU C Compiler collection (4.2.1) out of the box and you don't have to lose time for preconfiguration stuff to develope C-applications. The first step is to open a new terminal under Ubuntu.


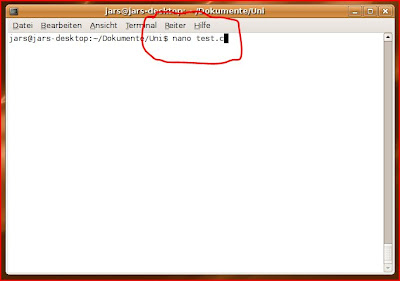
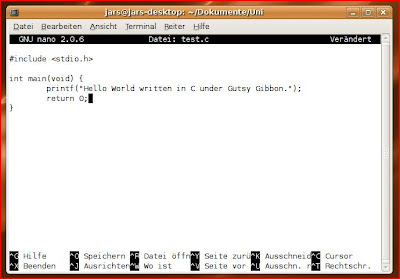
Then you have to create a new C-file with an editor of your choice. I prefer nano, so I typed nano test.c and the editor opens in the terminal with your file.


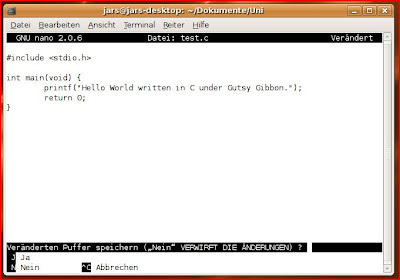
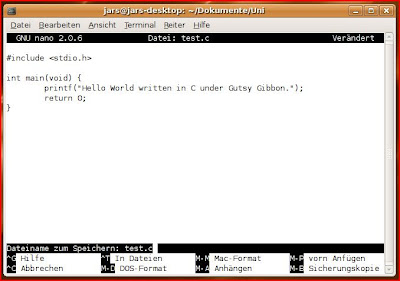
The next step is to write your 'Hello World' C-code and save it by pressing Strg+X (in nano), 'J' and 'Enter'. After those steps nano will save your code to your test.c file and you'll be able to compile it.


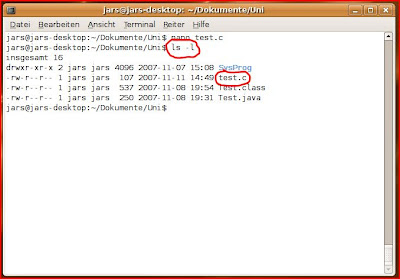
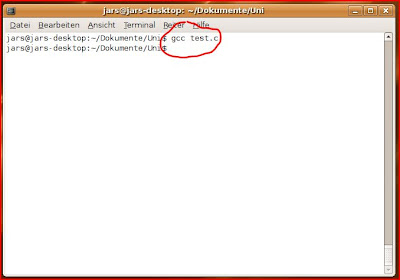
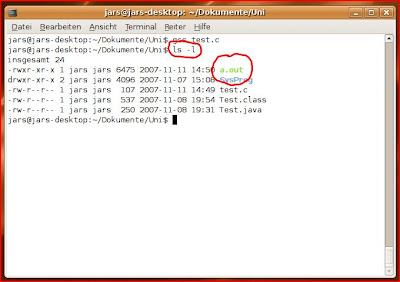
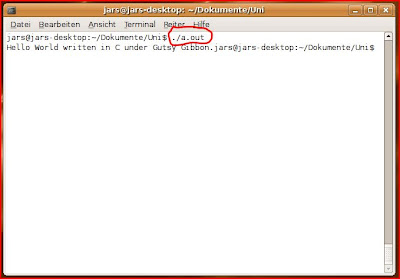
By typing gcc test.c the gcc-compiler will create an executable (if there are no errors in your application) and it's default name will be a.out. You will be able to execute it by typing ./a.out and press 'Enter'. Then you should be able to see your 'Hello World'-output.


Hope you liked this short tutorial about how to write a simple 'Hello World' application in C over a terminal in Ubuntu 7.10.

Cheers

Friday, November 09, 2007

C Coding with NetBeans under Ubuntu 7.10

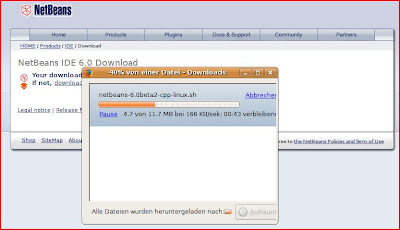
In this post I'd like to write about how to install NetBeans 6 Beta 2 under Ubuntu 7.10 Codename Gutsy Gibbon and how to use my favourite IDE for c/c++ coding. The first step is to go to the NetBeans Homepage and download the installables.

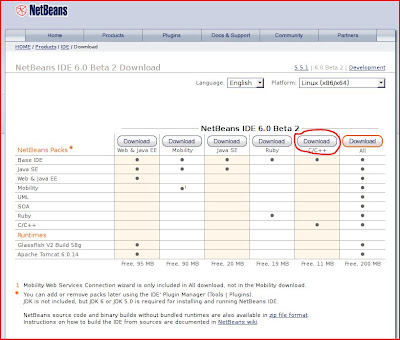
I've chosen the IDE in combination with the C/C++ Package. As you can see this constellation is very small (11 MB) but remember you won't be able to use it for Java Apps but of course you'll be able to download all plugins for NetBeans after you have installed the IDE.


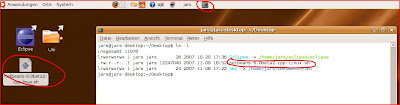
Save the packages to your desktop and open a terminal in Ubuntu. Change to your Desktop directory and then you should be able to see something like the following picture. Then type the command (which you can find in my terminal in the third picture) in your terminal and press Enter. Command: sudo sh netbeans-package.sh


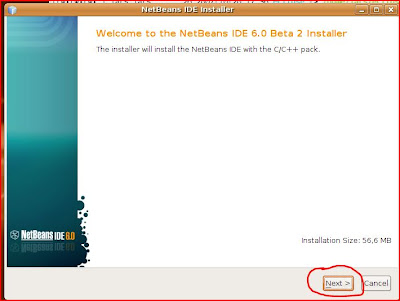
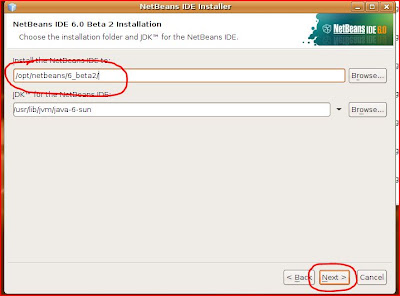
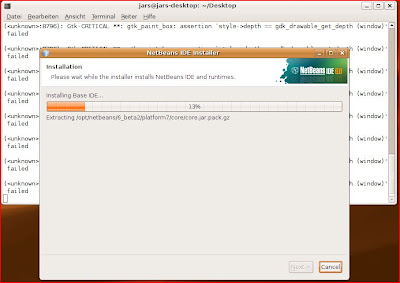
After calling this command in your terminal, a installation-wizard should pop-up and you just have to click yourself through this wizard. As you can see, it is very simple to install the IDE in Ubuntu.


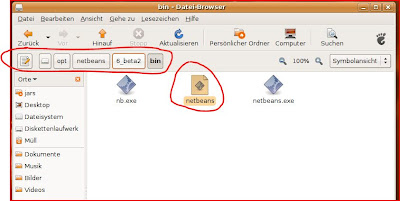
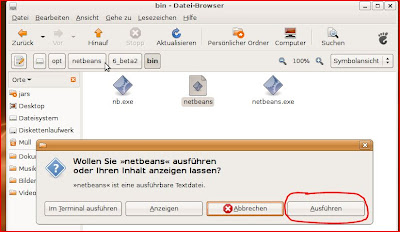
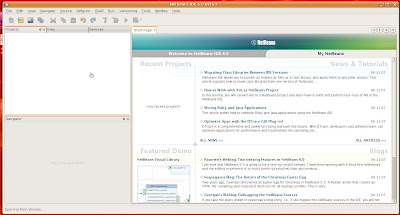
If the wizard has finished you have to execute a shell-file in the installation's bin-directory. After double-clicking this file a new pop-up will be shown. Here you just have to click on 'Ausführen' (Execute) and the IDE finally should start.


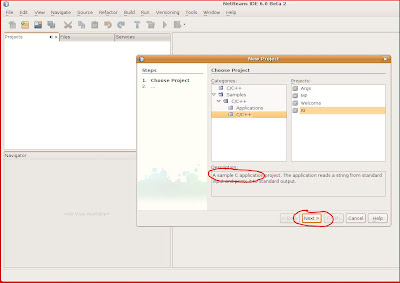
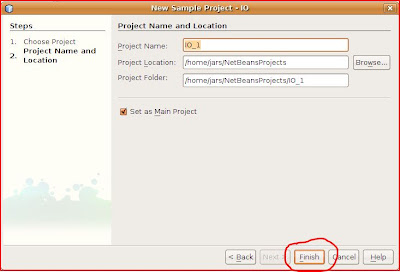
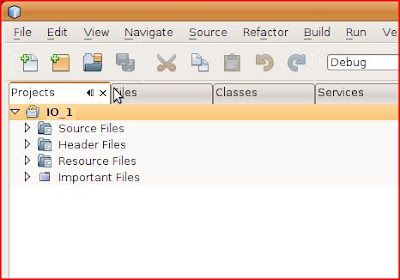
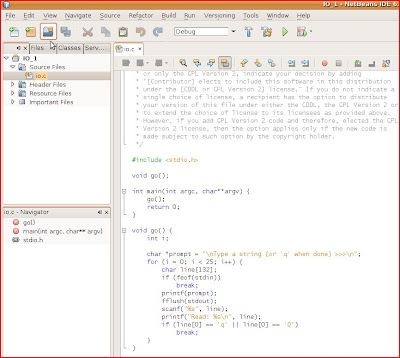
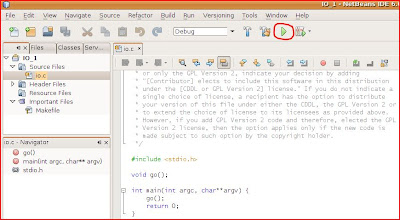
Now you'll be able to create an sample c-application which you'll find under File/New Project/Samples/C/C++/C/C++/IO. After creating this application you'll see the project-structure in your NetBeans-Projects-Tab and if you open your Source Files oi.c file you can see the c-code with Syntax Highlighting.


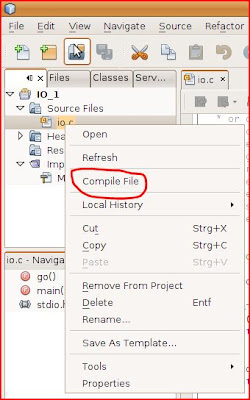
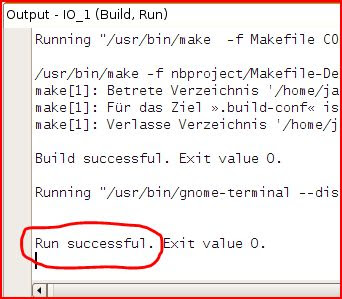
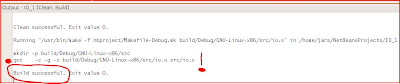
Now you can compile the file by right clicking it and chose Compile File to compile it. If there are no errors (and ther should be no errors) you should see something like Build Successful in you Output-Window. Then try to run the application by clicking the green Play-Button which you can find on the toolbar of your IDE.

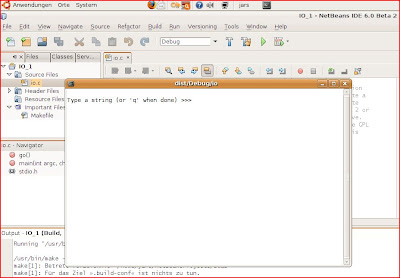
This will execute the Main-Project (your c-project) and a terminal window should pop-up where you should be able to type something. After clicking Enter your input will be printed out to the same terminal and if you want to quit the application just type a q and presse enter.


I hope you liked this tutorial and of course you can find more information on how to install the NetBeans-IDE in Ubuntu on the Netbeans-Wiki. This article will also describe the requirements which I didn't mention in my post e.g. you have to check if you have a working java version installed on your Ubuntu-System and so on.

Have nice weekend
Cheers

Wednesday, September 05, 2007

NetBeans Platform | GUIs

  • GUI Builder Matisse.
  • New Layout Manager: GroupLayout.
  • Form always will look like a native application on any OS.
  • If creating a new GUI-form there will be two files. A Java and a XML (form's layout) file.
  • Options Panel, Wizard, WIndow Component
  • Platform provides the infrastructure of event handling by generating the code to link the occurrence of each event invocation of a private method in the form class.
  • Connection Wizard for generating event infrastructure code.
  • TODO

Cheers

Sunday, September 02, 2007

Enterprise Java Beans

  • Wieder verwendbare Software Komponenten
  • EJBs Kapseln Anwendungslogik
  • Verfügen über keine Darstellungskomponente
  • Der Einsatz von EJBs lohnt sich erst ab mittelgroßen Systemen bei der verschieden Applikation auf die gleiche Businesslogik zugreifen.
  • EJB-Container ist notwendig

Aufgaben eines EJB-Containers

  • Überwachung des Lebenszyklus von EJBs
  • Instanzen-Pooling
  • Namens- und Verzeichnisdienst
  • Transaktionsdienst
  • Nachrichtendienst (Message Service)
  • Persistenz

Beans

  • In sich geschlossene Software-Komponente

JavaBeans

  • Eine JavaBean inst eine wiederverwendbare Software-Komponente, die mit einem Builder-Tool visuell manipuliert werden kann.
  • JavaBeans ist nichts anderes, als eine Sammlung von Eigenschaften einer (grafischen) Komponente.
  • Datencontainer mit bestimmten Eigenschaften eines Objekts.
  • Erlaubt diese Eigenschafte auch dynamisch zu erkennen und per Reflection zu manipulieren.
  • Konzentriert sich im Wesentlichen auf die Persistenz dieser Eigenschaften.

Enterprise JavaBeans (EJB)

  • Die EJB-Spezifikation beschreibt nun ein Framework, dass die verteilte Verarbeitung von transaktionsorientierter Geschäftslogik ermöglicht.
  • Bleiben für den Benutzer stehts verborgen.
  • Werden im Wesentlichen durch die APIs und Services definiert.
  • Kern der EJB-Technologie ist der Methoden-Fernaufruf (RMI).
  • Stub, Skeleton, Broker
  • Restriktionen siehe J2EE Codebook Seite 604

Entity Beans

  • Schnittstelle zur Datenbank oder anderen persistenten Speichermedien.
  • Repräsentieren ein Objekt der Business Logic.
  • Bean Managed Persistence vs Container Managed Persistence
  • Muss immer einen Primary Key besitzen.
  • Lebenszyklus siehe J2EE Codebook Seite 605

Session-Beans

  • Implementieren Geschäftsprozesse (e.g. Überweisung zwischen Konten)
  • Session-Beans operieren auf Entity-Beans
  • Stateful-/Stateless Session-Beans
  • Stateful Session-Bean: Für die gesamte Dauer des Session dem Client zugeordnet
  • Stateless Session-Bean: können auch unbemerkt innerhalb einer Session ausgetausht werden (vom Client unbemerkt).

Stateless Session-Beans

  • Diese vergessen, nachdem eine Operation abgeschlossen ist, den Client augenblicklich und können zu keinem Zeitpunkt entscheiden, ob sie mit dem aktuellen Client schon einmal verbunden waren.
  • Werden vom Container über einen Pool verwaltet.
  • Es ist nicht möglich Werte in einer Instanzvariable zu speichern.
  • Von ihnen bereitgestellten Methoden ähneln damit statischen Klassenmethoden.

Stateful Session-Beans

  • Können ihren Zustand in Instanzvariablen speichern. => Koversationsgedächtnis.
  • Client arbeitet stets mit der gleichen Instanz.
  • Verfügen über einen inneren Zustand, der häufig den Zustand und Fortschritt eines bestimmten Geschäftsprozesses darstellt.

Message Driven Beans

  • Ermöglichen ansynchrone Kommunikation von EJB-Komponenten über den Java Message Service (JMS).
  • Sind im Grunde erweiterte Stateless Session-Beans bei denen die Partner nicht mehr aufeinander warten müssen und parallel weiterarbeiten können.
  • Hinterlassen eine Nachricht (mit gewünschter Operation) im MessageQueue des Empfängers und schauen von Zeit zu Zeit in Ihrem Eingang, ob eine Antwort vorliegt.
  • Client kommuniziert nur über eine MessageQueue mit MDB.
  • Besitzen keinen inneren Zustand.

Bestandteile einer EJB

  • In der Regel besteht eine EJB aus mehreren Java-Klassen.
  • Home-Interface dient dazu, die Bean zu erzeugen.
  • Home-Interface muss von EJBHome abgeleitet werden.
  • Über das Remote-Interface kommuniziert der Client mit der entfernten EJB.
  • Dieses deklariert alle Methoden die der Client auf dem Objekt aufrufen kann.
  • EJB-Implementierung bildet den Kern der EJB-Anwendung und nimmt die gewünschte Geschäftslogik auf, implementiert die Methoden des Remote- und des Home-Interface, die erforderliche interne Repräsentation der Daten sowie Methoden, über die der EJB-Container die Bean verwaltet.

Eine Session-Bean erstellen

  • TODO

JNDI

  • Es handelt sich bei JNDI um eine Schnittstelle.
  • Die konkrete Implementierung wird auch Service Provider Interface genannt.
  • Naming Service = Name assoziiert mit einem Objekt
  • Directory Service = Zusätzlich können auch noch Attribute (read/write) gesetzt werden.
  • Beim Naming Service müssen die Objekte aller Kontexte von ein und demselben Typ sein.
  • Kontext = Suche, Auflistung von Objekten sowie die Erstellung und das Löschen von Einträgen.
  • Ermöglicht es, flexible Verbindung zwischen unseren Komponenten zu verwenden und diese damit zu entkoppeln.

Naming Services

  • Verbindet eine Menge von Namen mit Objekten eines bestimmten Typs.
  • Diese können in einem Kontext abgelegt werden.
  • Syntaxregel = Naming Conventions
  • Atomic Name (e.g sun), Compound Name (e.g. java.sun.com), Composite Name (e.g. java.sun.com/home/index.jsp)
  • Namenskonventionen Buch Seite 182

Directory Services

  • Ein Directory ist eine Menge von Verzeichnisobjekten, Directory Entries, welche bestimmten Objekten oder Referenzen auf Objekten zugeordnet sind. Im Gegensatz zu den Naming Services sind Attribute möglich.
  • Klassisches Beispiel => Telefonbuch
  • RDBMS vs DS Buch Seite 184
  • DS => über das Netzwerk verteilte, hierarchische Datenbank, die auf einem Client/Server-Prinzip basiert.

LDAP

  • Unterstützt im wesentlichen den Zugriff auf Verzeichnisse und emuliert andere Funktionen lediglich.

How To

  • File System Service Provider speichert gebundene Objekte in versteckter Datei (.bindings), die sich unter Windows im Root-Verzeichnis des aktuellen Laufwerks befindet.

Tuesday, July 24, 2007

NetBeans Modules

I'd like to sum up chapter three and four of my relatively new book "Rich Client Programming - Plugging into the NetBeans Platform". It is about all the different types of modules which the Platform provides and when you should use each of it.

End-User Interface Module
No other module depends on this kind of module.

Simple Library
Other modules can depend on this type of module. (E.g. Apache Commons Collection)

Modular Library
There is a strict separation of API (specification) and it's implementation. There are at least two modules necessary to support this requirement, one for the API (incl. Documentation) and one for the implementation.

Three basic types of modules in the NetBeans runtime container

Regular
User-Visible Functionality – Director of the enablement state of other modules.

Autoload
Without them nothing works. No User-Visible functionality. Only used by other libraries. Out of control of end users.

Eager
Eager modules are enabled as soon as possible. Eager modules cannot be disabled directly by the user. Bridges functionality between two independent modules.

Monday, July 09, 2007

Wednesday, July 04, 2007

Things I'd like 2 do...

... or in other words: I'd like 2 dig into. There are many new tutorials and blog-entries about NetBeans and other Java based technologies and almost every day the number of tutorials grow. To keep track on those I'd like to sum up the very new ones or those I'd really should have a closer look on:
Cheers

Tuesday, July 03, 2007

Maven feat. JUnit 4

Because of my bachelor-project I'd like to describe how to configure maven 2.0.7 to execute JUnit 4 tests. I'd like to show three possible ways how to set everything up. First I show some screenshots how to integrate everything in my favourite IDE NetBeans (M9).

I won't show all the preconfigs e.g. how to install all the necessary software you'll need to follow along. Have a look at one of my last posts for those issues. After you have installed Java, NetBeans M9, Maven 2.0.7, all necessary maven-plugins in NetBeans, you will be able to do the following:
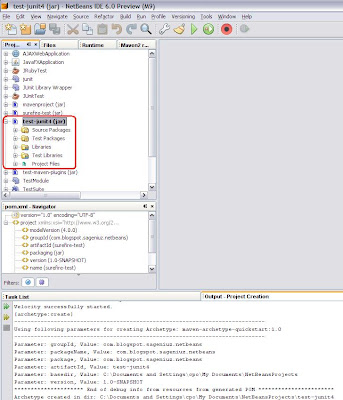
  1. Create a new Maven Project (File/New Project/Maven/Maven Project/Maven Quickstart Archetype)

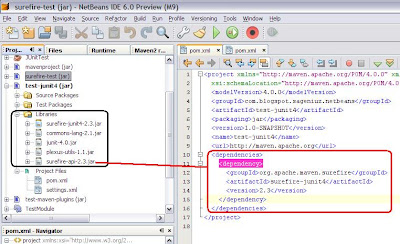
  2. Change your pom.xml to configure maven to use junit 4 not 3.8.1 by adding the maven-surefire-junit4 and deleting the junit dependency. Maven will automatically download all necessary dependencies, even the transitive ones and because surefire-junit4-2.3 depends on junit-4.0 this jar will also be downloaded.

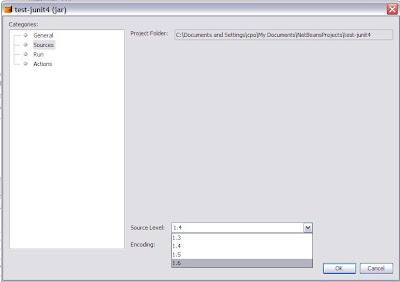
  3. Change IDE's source-level to a Java-Version greater than 1.4 (in my case 1.6) because JUnit 4 needs it. Right click on your maven-project, got to Sources menu on the left and select your source-level.

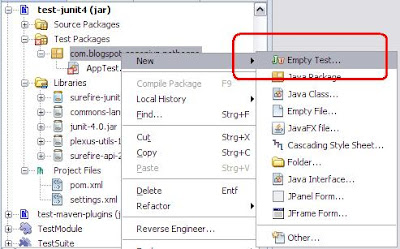
  4. Lets create a simple JUnit 4 Test by right clicking your test-package, new/Empty Test...
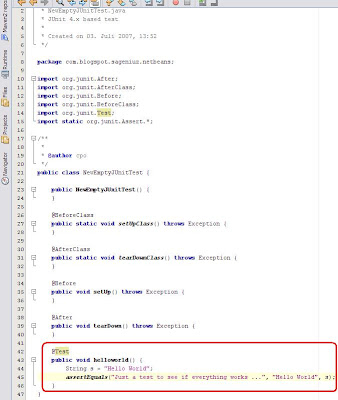
  5. Create a very simple "helloworld"-Test Method by implementing the following:

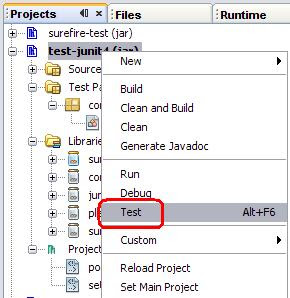
  6. So lets invoke maven and the surefire-plugin by right clicking your maven-project and Test.

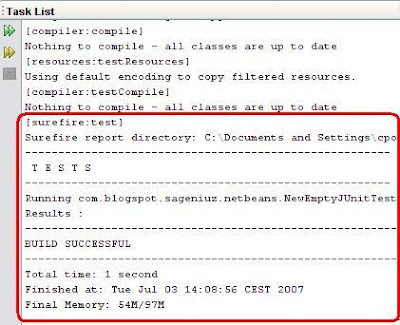
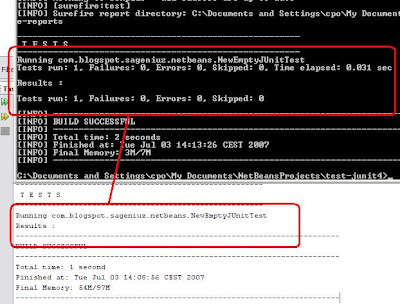
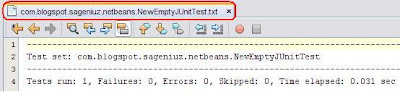
  7. The following output will be produced. I don't have an idea why we aren't able to see the same output as the output which will be produced by invoking maven over the command-line (by the way: this is another possibility to run JUnit 4 tests) ? Do you have an idea?


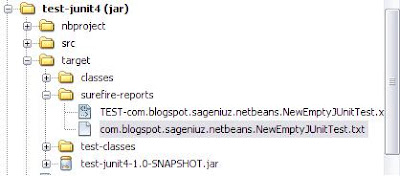
  8. You can find the same output under the NetBeans-File tab, in the project's target/surefire-reports folder:


So that's it with NetBeans and two of three possible ways how to run maven with Junit 4. No I'd like to show how to configure Maven and Eclipse (by the way: I use the new version of Eclipse ==> Codename: Europa). So here we go...
  1. First you have to install the M2 Eclipse Plugin: Have a look at my "Debugging Custom Maven Plugins"-How To. There you will find how to install the plugin in the IDE.
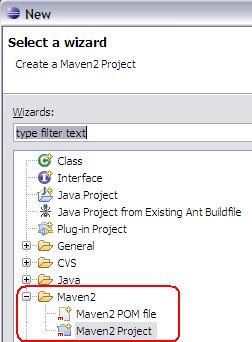
  2. Then you have to create a Maven Project by cklicking: File/New/Other... and Maven/Maven2 Project.


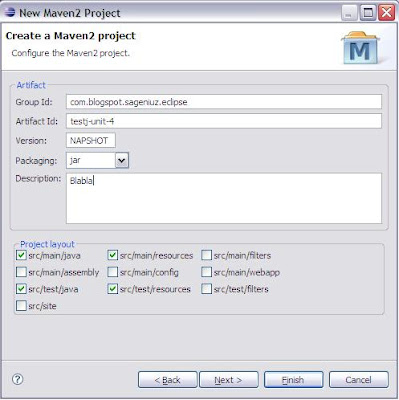
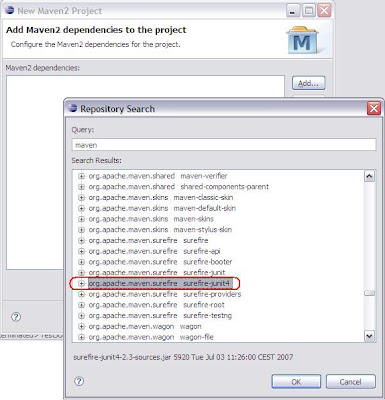
  3. Configure your project's general settings. First set groupId, artifactId, version etc. then click Next and configure all necessary project-dependencies. Select version 2.3 for the surefire-junit4 plugin.


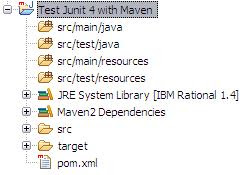
  4. Now you should see the following or something similar: If not right click your project, Maven/Update Sources and now you should see almost the same. If not check all your settings or post a comment so I'll be able to help you.


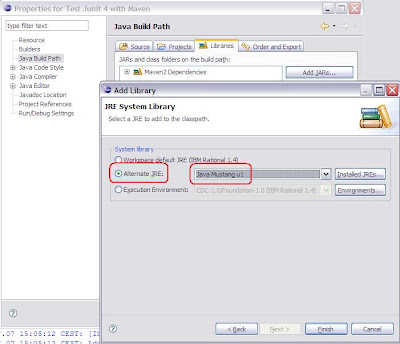
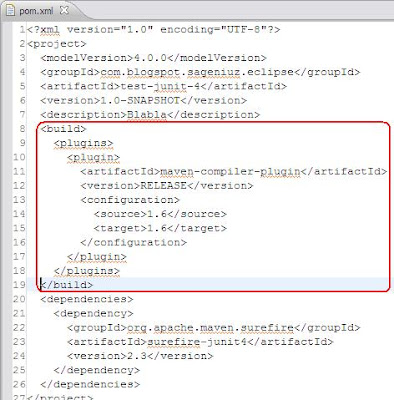
  5. Again you have to change your Java JRE settings to a higher source-level than 1.4 because of Junit version 4. Right click your project, chose Properties and then select another JRE. Then you have to change your source-level by writing the following in to you build-section of your project's pom.xml


  6. Now you have to invoke maven's install-plugin by executing the command: mvn install. Maven will then download all necessary plugins e.g. junit-4.0.jar, etc.

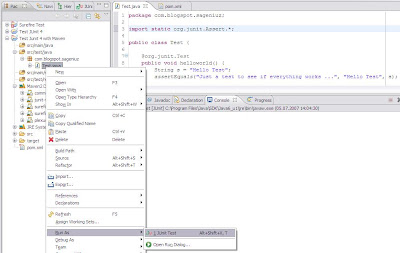
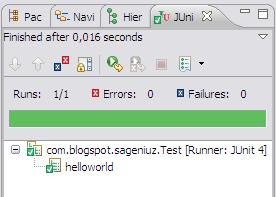
  7. After writing a simple JUnit 4 Test you'll be able to run the test within Eclipse by right clicking the test => "Run As/JUnit Test". After you invoked this command Eclipse opens the JUnit-View and you should see something like this:


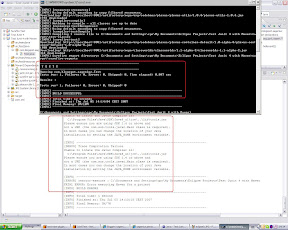
  8. Now, I tried to run the test via M2 Eclipse Plugin but the build failed. Have a look at the output, you'll see the error-log and maybe it makes sense to you but I don't have any ideas why the tests fail. If you invoke the same command (mvn test) over the command-line everything works fine so it seems to me that the M2 Plugin is Buggy.


Maybe, if you have a solution you can post it, I'd be very thankful.
Have fun coding with maven and JUnit with your favourite IDE.

Cheers