Wednesday, November 21, 2007

How 2 Test PL/SQL with Oracle 10g | Part 1

In this post I'm going to show you how to test simple PL/SQL queries on an Oracle 10g database. Because this year I focus on databases I've decided to attend 'Database Management Systems' which is a lecutre at my university.

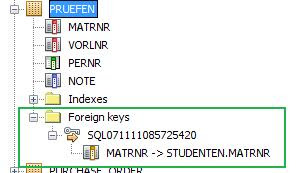
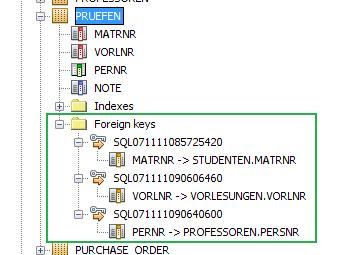
This lecture or better the responsible institute provides an Oracle 10g database for all students who'd like to complete the corresponding exercise. Here is the description of the first exercise. I had to design a (small) complete database including EER-Diagram, relations, CREATE TABLE, DROP TABLE and INSERT INTO statements.

So, if you already have designed the EER-Diagram and corresponding database-relations you have to implement the necessary sql-files and execute them on the server which is provided by the lecture's institute. I focus on showing you how to test under Windows Vista.

The first step I had to do I had to download a ssh-client for my OS to connect to the universities' server. I chose Putty because I'm a experienced on using this client. After I've successfully installed Putty I tried to connect to the server by opening a new session.


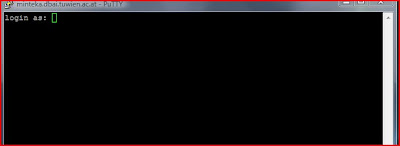
I've entered my creds and finally I successfully was connected.


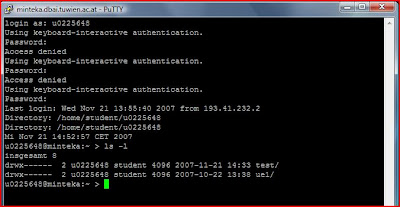
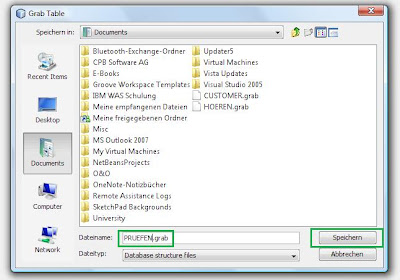
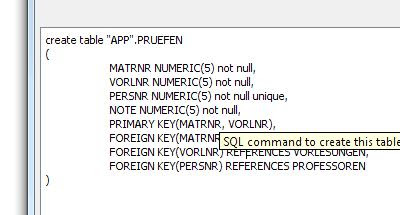
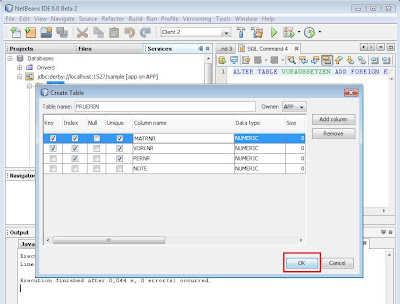
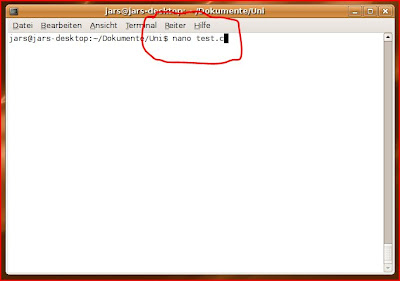
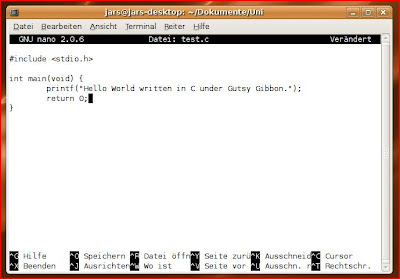
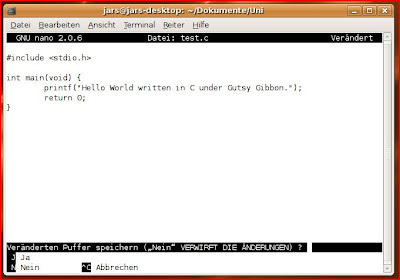
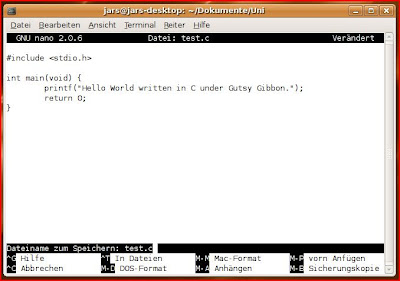
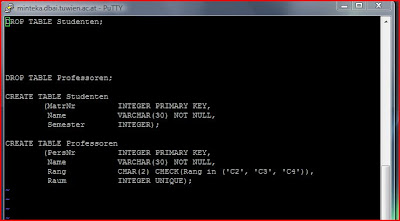
Then I've create a test directory where I wrote my first create_table.sql file with vim.


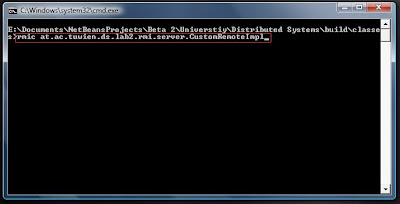
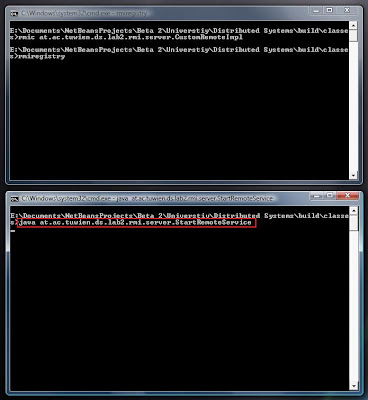
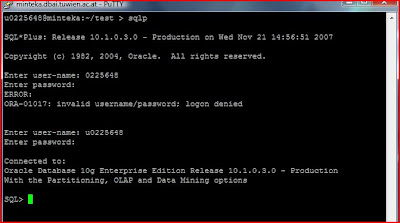
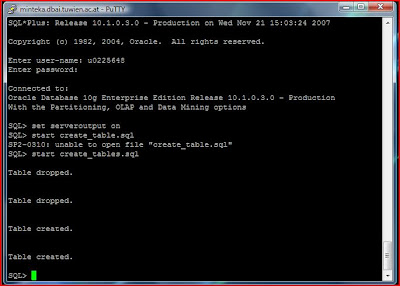
In the next step I've started a new Putty-Connection to run the table script by entering 'slqp' on the command-line. Again I had to enter my creds for this SQLPlus session.


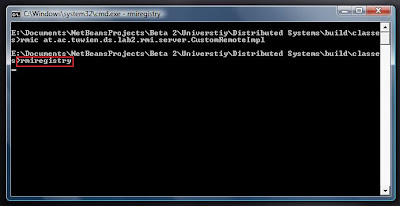
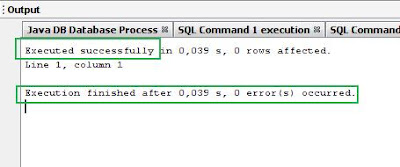
The first command which you should enter is the 'SET SERVEROUTPUT ON' command to get the corresponding output of the server after you have executed a query.


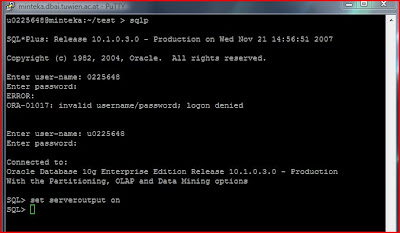
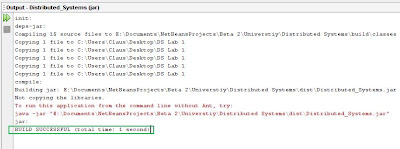
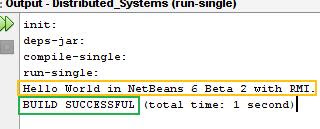
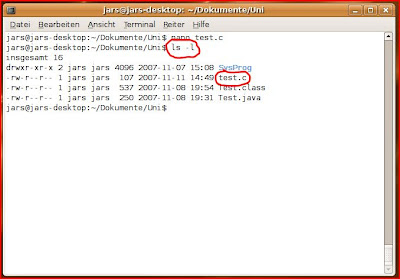
Then I've testet my create_table.sql file by typing 'start PATH_TO_FILE/create_table.sql'. If your sql-file successfully executed you can type 'exit' to exit the SQLPlus session.


To be continued ...

Monday, November 19, 2007

IBM WAS Education Assistant

In this post I'd like to reference a very important Web-Site if you are interested in IBM's WebSpere Application Server. This site is called the IBM Education Assistant where you can find a lot of good ressources about the Application Server in a variety of versions (5, 6, + fixpackages, ...).

In addition you'll find a lot of good screencasts and slides which gives you a pretty good overview about this product. A few posts ago I showed off a little by posting about my IBM Certificate for the IBM WAS 6.1 and if you are interested in what I've learned in that IBM training, go to the Education Assistant and watch all the screencasts which you can find under 'WebSphere Application Server 6 / V6.1'


Cheers

Tuesday, November 13, 2007

Java Rules Engines | Words and Phrases

This Posting is about the book which I'm currently reading. (Java Rules Engines) The Post summarizes some words or phrases which were new to me and I'd like to remember them. Because I even didn't know those in german I'm going to sum them up in german.

Kapitel 1 Buch Seite 15: virale Ansätze.
Ein Viral ist ein Werbespot, der eigens für das Internet produziert wird. Sein Name leitet sich ab von der Werbeform, innerhalb derer er konzipiert und eingesetzt wird, dem viralen Marketing

Kapitel 1 Buch Seite 15: kognitive Fähigkeiten:
Der Begriff kognitiv stammt aus der Psychologie und bezeichnet solche Funktionen des Menschen, die mit Wahrnehmung, Lernen, Erinnern und Denken, also der menschlichen Erkenntnis- und Informationsverarbeitung in Zusammenhang stehen.

Kapitel 1 Buch Seite 20: Konsekutivsätze:

Das Adjektiv konsekutiv bedeutet soviel wie zeitlich folgend, von einer vorherigen Gegebenheit abhängig.

Kapitel 1 Buch Seite 23: Omnipotente Schnittstelle:

Mit Allmacht, Allmächtigkeit oder Omnipotenz wird die Fähigkeit eines Wesens bezeichnet, jedes Ereignis auch jenseits naturwissenschaftlicher Erklärbarkeit in Gang zu setzen oder zu beeinflussen.

Kapitel 1 Buch Seite 25: Profan:

Es bezeichnet im eigentlichen Sinne die Eigenschaft von Objekten oder Handlungen, die nicht im Zusammenhang mit einem Kult stehen, die keine rituelle oder religiöse Bedeutung tragen und denen keine magischen Eigenschaften und Wirkungen zugesprochen werden.

To be continued...

Monday, November 12, 2007

RMI with NetBeans 6 Beta 2

Please don't let mislead you because of this post's title. NetBeans doesn't have any special features for RMI support. I've only chosen this title because I'm going to develop my RMI-Service in NetBeans 6 Beta 2 which is my favourite IDE.

I won't explain every detail of RMI because you will find a lot of good tutorials on the web anyway. So, the first step is to open your IDE and develop the Interface for your RemoteService:


Second step: Write your service implementation class.


package at.ac.tuwien.ds.lab2.rmi.server;

import java.rmi.RemoteException;
import java.rmi.server.UnicastRemoteObject;

/**
* Implementation of ICustomRemot Interface.
* @author Claus Polanka
*/
public class CustomRemoteImpl extends UnicastRemoteObject implements ICustomRemote {

/**
* Necessary because Super-Class constructor throws RemoteException.
* @throws java.rmi.RemoteException Will be thrown if there are some network
* errors.
*/
public CustomRemoteImpl() throws RemoteException {
}

/**
* Returns a string which say 'Hello World with NetBeans 6 Beta2 and RMI.'
* @return the string which holds the value.
* @throws java.rmi.RemoteException Will be thrown if there are some network
* problems.
*/
public String sayHello() throws RemoteException {
return "Hello World in NetBeans 6 Beta 2 with RMI.";
}
}


Next step ist to implement a class who starts your remote service:


package at.ac.tuwien.ds.lab2.rmi.server;

import java.net.MalformedURLException;
import java.rmi.Naming;
import java.rmi.RemoteException;
import java.util.logging.Level;
import java.util.logging.Logger;

/**
* Starts the CustomRemote Service.
* @author Claus Polanka
*/
public class StartRemoteService {

/**
* @param args the command line arguments
*/
public static void main(String[] args) {
try {
ICustomRemote service = new CustomRemoteImpl();
Naming.rebind("HelloWorldService", service);
} catch (RemoteException ex) {
Logger.getLogger(StartRemoteService.class.getName())
.log(Level.SEVERE, null, ex);
} catch (MalformedURLException ex) {
Logger.getLogger(StartRemoteService.class.getName())
.log(Level.SEVERE, null, ex);
}
}

}


Now, after you have finished the serverside of your RMI application, it's time to develop the client who calls the service.


package at.ac.tuwien.ds.lab2.rmi.client;

import at.ac.tuwien.ds.lab2.rmi.server.ICustomRemote;
import java.net.MalformedURLException;
import java.rmi.Naming;
import java.rmi.NotBoundException;
import java.rmi.RemoteException;
import java.util.logging.Level;
import java.util.logging.Logger;

/**
* Calls my RemoteService.
* @author Claus Polanka
*/
public class Client {

/**
* Makes a lookup and gets the String of the RemoteServcie.
*/
public void run() {
try {
ICustomRemote remoteService = (ICustomRemote)
Naming.lookup("rmi://127.0.0.1/HelloWorldService");

// Calls remote method.
String remoteString = remoteService.sayHello();

System.out.println(remoteString);

} catch (NotBoundException ex) {
Logger.getLogger(Client.class.getName()).log(Level.SEVERE, null, ex);
} catch (MalformedURLException ex) {
Logger.getLogger(Client.class.getName()).log(Level.SEVERE, null, ex);
} catch (RemoteException ex) {
Logger.getLogger(Client.class.getName()).log(Level.SEVERE, null, ex);
}
}

/**
* @param args the command line arguments
*/
public static void main(String[] args) {
Client client = new Client();
client.run();
}
}


Now, compile everything and you should see something like the following output:


So, if you have the same environment as I have (only one machine ;-) you don't have to copy anything to another location. Just generate the Service Stub-Class, start the rmiregistry and start your service. Then your client should be able to execute the Service and print out it's result which is in my case a simple string.

Generate Stub-Class:


Now, you should be able to see a new generated class in corresponding package where you have generated the Stub.


Start the RMI-Registry to register the Service.


Start your service and bind it to your registry.


Let's run the Client.


And see the result.


Hope you liked it.

Cheers

How To Rename Colums in Derby DB and NetBeans 6 Beta 2

Yesterday, I showed you how to create foreign keys in Derby DB within NetBeans 6 Beta 2 database tools. After I thought I had finished this tutorial I noticed a little mistake in my 'PRUEFEN' table of my database.

The primary key or better the foreign key 'PERNR' had the wrong name. The right name should have been 'PERSNR' which is a reference to the primary key 'PERSNR' of my 'PROFESSOREN' table. So, how can I refactore this little (I thought it was little but it wasn't) mistake.

The first step I have done was to search for a solution in the Derby documentation and it's SQL implementation and feature support. Today I've finally realised that something like 'ALTER TABLE RENAME COLUMN OLDNAME TO NEWNAME' isn't supported by Derby so I tried to figure out an alternative way to find a solution for my problem. Here's what I did:

I've created a backup of my table and with this backup I'm able to recreate my table again. The idea was to delete the old 'PRUEFEN' table and create a new one by recreating the old table.

This will open a dialog with a SQL command which will set up my new table (=> simple CREATE TABLE statement). So, the advantage of this workaround is, I just have to rename my column in the SQL-statement and I would have found a solution for my problem... BUT... (keep on reading ;o)

First of all you'll be able to backup your table by right clicking it and execute the 'Grab Structure...' command. A save-dialog will pop up and there you can choose a place to save your table structure.


No you will be able to grab this structure of your old table and recreate a new one by right clicking the Table folder und select the 'Recreate Table...' button. Of course you have to rename your table if you haven't deleted the old 'PRUEFEN' table to something like 'PRUFENNEW'.


This will open up a new diaolog with the CREATE TABLE statement. Now by clicking the 'Edit table script' button you will be able to change your column name. If you have already forgotten... that's why I've started to write this tutorial ;-)


Have you recognized the table script in the above picture? Where have all the foreign keys gone? Hmmmmmm.... So now I have the same work as yesterday. Hopefully in the final release this problem will be solved. I changed my table script so all my requirements are implemented and that is what it looks like:


Finished! No.... I've forgotton the PERSNR foreign key. Damn it! But I have to do the whole work again anyway because I don't want to have the '...NEW' in my table's name. Ahhhh ;o)

Finally: My Script and my Table view


So, what do you think...? I think that's not a quite easy and effective workaround. Hopefully we will see some improvements in the final release of NetBeans 6.

Cheers

Sunday, November 11, 2007

Foreign Keys in Derby with NetBeans 6 Beta 2

Although NetBeans 6 Beta 2 provides several convenient tools for working with databases it was not possible to create a table and set foreign keys without using SQL statements.

So how did I set those foreign keys in my tables using the integrated Derby database which comes out fo the box with Netbeans. So first of all I've created my tables using the 'Create Table' tool of NetBeans by right clicking my 'Tables' folder of a connected database and execute the 'Create Table...' command.


Then you will be able configure you table by editing your table scheme. In my case I have a 'PRUEFEN' table which represents a relation between students (N), lectures (N) and teachers (1) so I have three foreign keys: MATRNR (students), VORLNR (lectures) and PERNR (teachers) but you won't be able to set those foreign keys with this database tool.


So, after clicking the 'OK' button your table will be created but no foreign keys will be set. If you click on your foreign keys folder in your table structure you won't find any. So, you have to additionally add them by executing the corresponding SQL ALTER statements.


Right click your foreign keys folder and press the 'Execute Statement...' command.


Then type the following command: ALTER TABLE PRUEFEN ADD FOREIGN KEY(MATRNR) REFERENCE STUDENTEN; as you can see in the next picture and run the command by clicking the little run-button which you can find over the sql statement.


So, if there are no errors you should see something like the following screen shows in your output window.


Then you have to refresh your table by right clicking it and press the 'Refresh' button. Now you should be able to see the new foreign key reference. You have to repeat this approach for every foreign key in your table.


Finally you should have successfully configured all foreign keys but hold on I've found a little mistake in my table: PERNR should be renamed to PERSNR. But this is the topic of my next post tomorrow: How to rename columns in Derby within NetBeans.

Goold night and I hope this tutorial can help you to design your database tables.

Cheers

C over a Terminal in Gutsy Gibbon

Today I'd like to show you how to write an 'Hello World' application in C language under Ubuntu 7.10 Codename Gutsy Gibbon over a terminal without using an IDE.

If you have the same version of Ubuntu (VMWare Image) as I have then you have the newest version of the GNU C Compiler collection (4.2.1) out of the box and you don't have to lose time for preconfiguration stuff to develope C-applications. The first step is to open a new terminal under Ubuntu.


Then you have to create a new C-file with an editor of your choice. I prefer nano, so I typed nano test.c and the editor opens in the terminal with your file.


The next step is to write your 'Hello World' C-code and save it by pressing Strg+X (in nano), 'J' and 'Enter'. After those steps nano will save your code to your test.c file and you'll be able to compile it.


By typing gcc test.c the gcc-compiler will create an executable (if there are no errors in your application) and it's default name will be a.out. You will be able to execute it by typing ./a.out and press 'Enter'. Then you should be able to see your 'Hello World'-output.


Hope you liked this short tutorial about how to write a simple 'Hello World' application in C over a terminal in Ubuntu 7.10.

Cheers