Showing posts with label Maven. Show all posts

Friday, September 28, 2007

IBM Rational Clear Case vs. Continuum Build Server

and how to install a Business Module on a Build-Server. I haven't blogged for a long time now because I was/am very busy at work and also university starts next week and I had/still have to do some prep-work for it.
In this post I'd like to write a tutorial about how to install a Business Module on the Continuum Build-Server. This so-called Business Module is a company-specific multi-module Maven-project which stands under version-controll of IBM's Rational Clear Case.
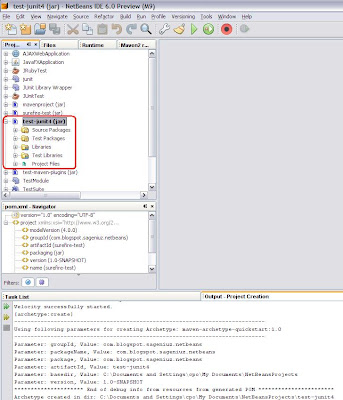
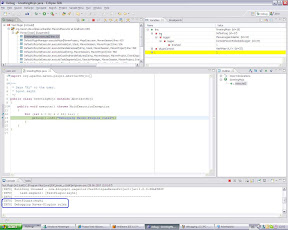
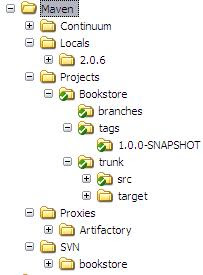
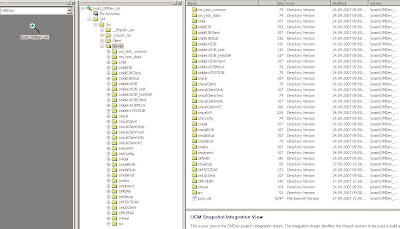
In the following screenshot you're able to see the directory-structure of the Business Module in an Editor-View of Clear Case on my local workstation. This view shows a so-called Dynamic View of the Business Module.
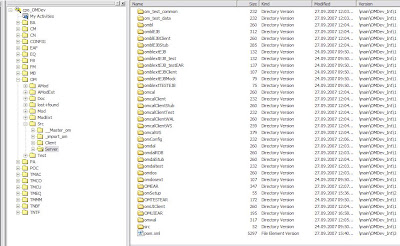
From Misc


My upcoming task is to create a View of the Business Module's Integration Stream on another workstation within the company's intranet. Why do I have to do this?

The Continuum Build-Server only handles Maven-Projects on the same machine as the server is installed. God thanks on this server there is also a version of IBM Rational Clear Case installed so it won't be a problem to get the Business-Module deployed on Continuum.

So, the first thing to do is to start a Remote-Desktop-Control and connect to the server where everything is installed. The next step is to open the Project Explorer which is a sub-application of Clear Case. You will be able to see this explorer in the next screenshot.
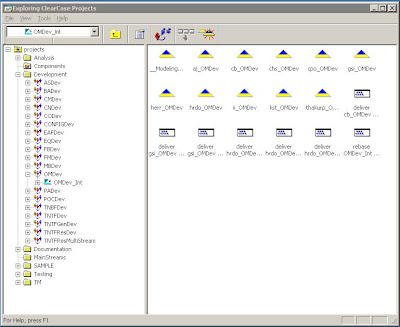
From Misc


You now have to select the Business Module's Integration Stream of which you want to create a View. In my case I have to select the OMDev_Int. Right click the Integration Stream and choose 'Create View...'
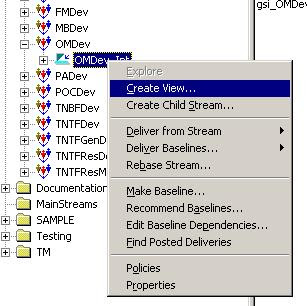
From Misc


A new window will pop-up. In this window you can leave all the selected options and click Next.
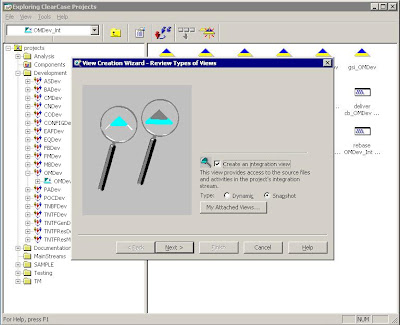
From Misc


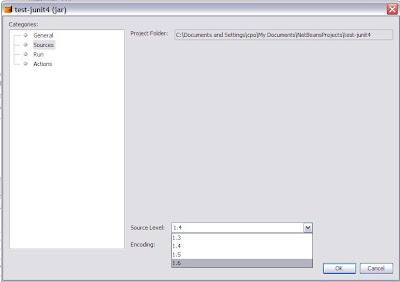
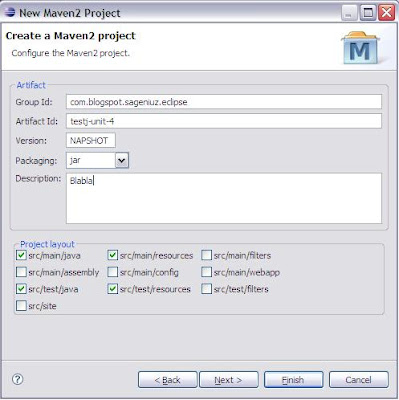
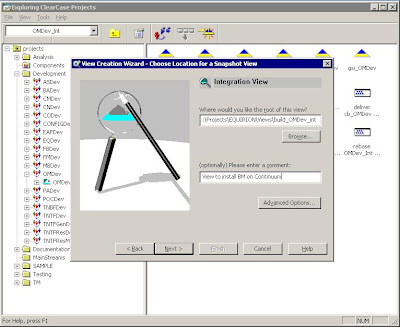
Now choose the directory where you would like to copy all the Business Module's files and optionally enter a corresponding comment and then click next.

From Misc


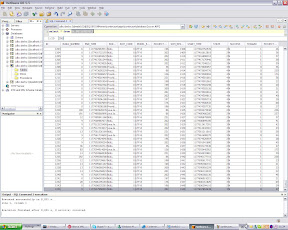
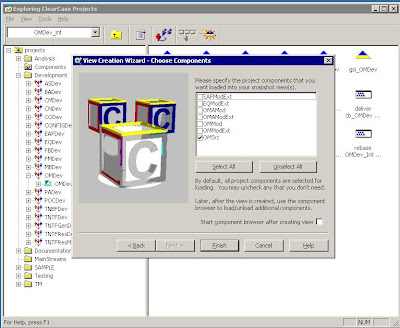
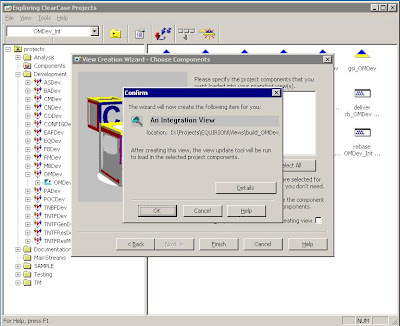
In the wizzard's next screen you are able to choose the components which you would like to copy to your workstation. In my case I only need the OMSrc component. Click next. A confirmation screen appears and again click next.

From Misc


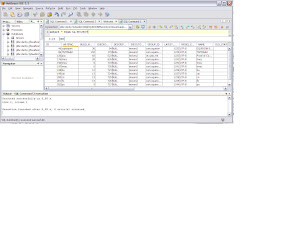
Now all the sources will be copied to the path which you have entered a couple of screens before.

From Misc


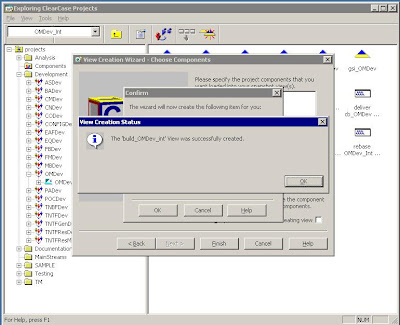
If everything worked out fine you should see a 'View successfully created'-screen as the following.

From Misc

Now open your Clear Case Explorer and press Alt+F5. This shortcut will refresh your Clear Case View Shortcuts and then you'll be able to see the new Business Module with all your chose components.

From Misc

New Business Module wiht Src-component.
From Misc

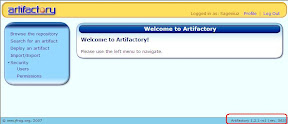
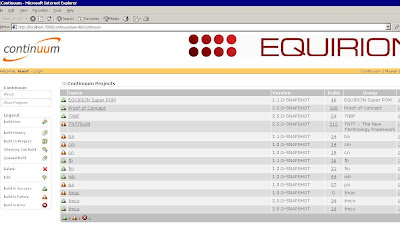
The next step is to install the Business Module on Continuum Build-Server. So, open your Web Browser and start your Continuum installation.

From Misc

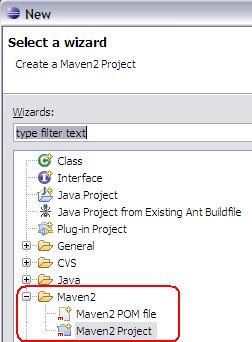
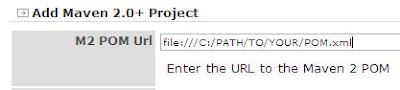
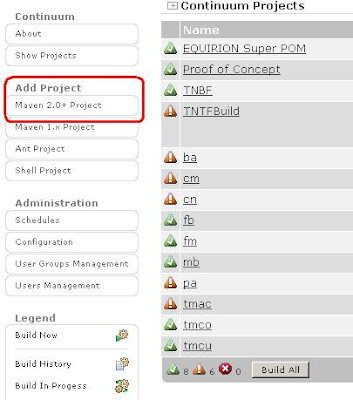
Login and press the 'Maven 2.0+Project' button under the category 'Add Project'.
From Misc

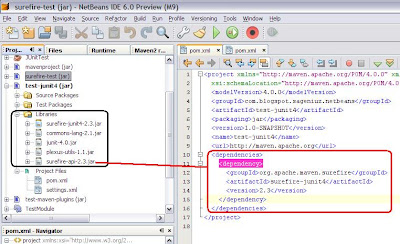
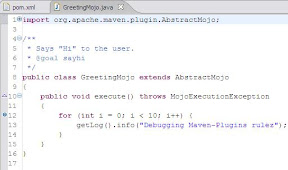
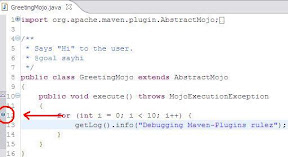
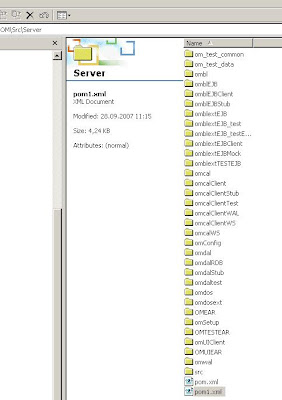
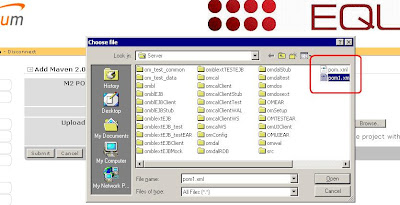
Now here comes the tricky-part. Continuum will have problems with your pom.xml file because it stands under version-control and hence it is read-only. Here comes the workaround: You have to create a new pom-file and call it something like 'pom1.xml'.

From Misc

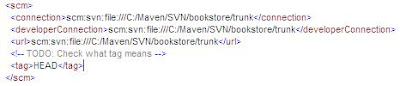
Now you will have to copy the whole content of the original pom and paste it to the newly created one. Continuum has problems with mulit-module projects so if you want to browse for the file you have to delete all the modules, assumed you have configured one in the pom-file, and then Continuum won't have any troubles anymore.

From Misc

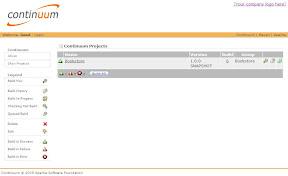
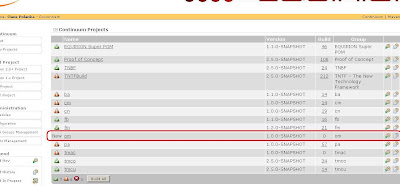
After pressing the Submit-button you should see something like the following screen:

From Misc

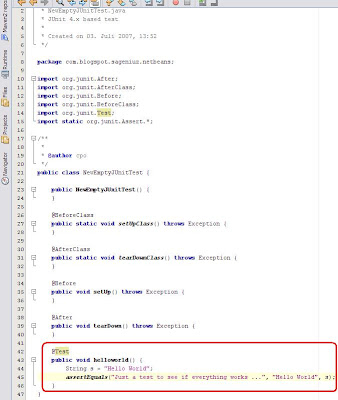
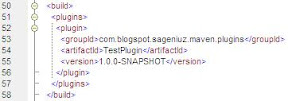
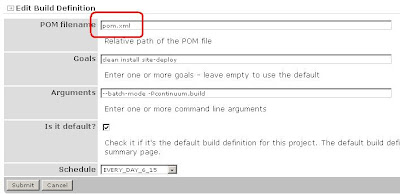
Now you can confiugre your build-settings for the new Business-Module. If you also have a multi-module project you will ask yourself how it will work that all the modules which you have deleted previously in your pom1.xml will now also build in Continuum. The answer is: If you configure your Build Definition you will be able to configure the old pom.xml by passing the path to it. You can see my settings in the following screen:

From Misc

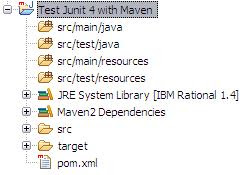
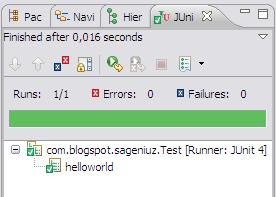
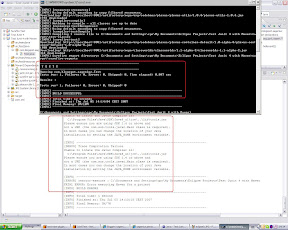
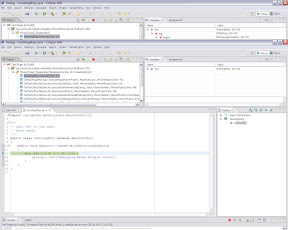
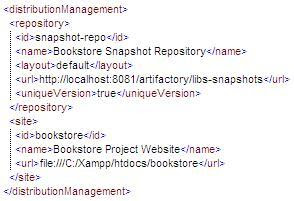
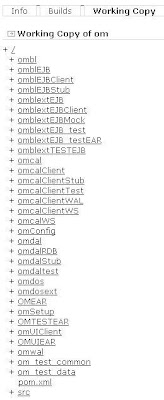
So now, if you invoke the build with these settings all the sub-modules will also be build. Tricky ha, but very effective ;o) You don't believe me? Swich to your 'Working Copy'-view of your project and then you will see all modules which are configured in your original pom.xml file.

From Misc

And, what's your result? Are you also able to see something like the follwing:
From Misc

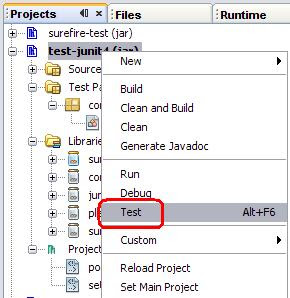
Happy Mavin'-Continuumin'-CCin'

Cheers

Wednesday, July 04, 2007

Things I'd like 2 do...

... or in other words: I'd like 2 dig into. There are many new tutorials and blog-entries about NetBeans and other Java based technologies and almost every day the number of tutorials grow. To keep track on those I'd like to sum up the very new ones or those I'd really should have a closer look on:

Cheers

Tuesday, July 03, 2007

Maven feat. JUnit 4

Because of my bachelor-project I'd like to describe how to configure maven 2.0.7 to execute JUnit 4 tests. I'd like to show three possible ways how to set everything up. First I show some screenshots how to integrate everything in my favourite IDE NetBeans (M9).

I won't show all the preconfigs e.g. how to install all the necessary software you'll need to follow along. Have a look at one of my last posts for those issues. After you have installed Java, NetBeans M9, Maven 2.0.7, all necessary maven-plugins in NetBeans, you will be able to do the following:
  1. Create a new Maven Project (File/New Project/Maven/Maven Project/Maven Quickstart Archetype)

  2. Change your pom.xml to configure maven to use junit 4 not 3.8.1 by adding the maven-surefire-junit4 and deleting the junit dependency. Maven will automatically download all necessary dependencies, even the transitive ones and because surefire-junit4-2.3 depends on junit-4.0 this jar will also be downloaded.

  3. Change IDE's source-level to a Java-Version greater than 1.4 (in my case 1.6) because JUnit 4 needs it. Right click on your maven-project, got to Sources menu on the left and select your source-level.

  4. Lets create a simple JUnit 4 Test by right clicking your test-package, new/Empty Test...

  5. Create a very simple "helloworld"-Test Method by implementing the following:

  6. So lets invoke maven and the surefire-plugin by right clicking your maven-project and Test.

  7. The following output will be produced. I don't have an idea why we aren't able to see the same output as the output which will be produced by invoking maven over the command-line (by the way: this is another possibility to run JUnit 4 tests) ? Do you have an idea?


  8. You can find the same output under the NetBeans-File tab, in the project's target/surefire-reports folder:


So that's it with NetBeans and two of three possible ways how to run maven with Junit 4. No I'd like to show how to configure Maven and Eclipse (by the way: I use the new version of Eclipse ==> Codename: Europa). So here we go...

  1. First you have to install the M2 Eclipse Plugin: Have a look at my "Debugging Custom Maven Plugins"-How To. There you will find how to install the plugin in the IDE.
  2. Then you have to create a Maven Project by cklicking: File/New/Other... and Maven/Maven2 Project.


  3. Configure your project's general settings. First set groupId, artifactId, version etc. then click Next and configure all necessary project-dependencies. Select version 2.3 for the surefire-junit4 plugin.


  4. Now you should see the following or something similar: If not right click your project, Maven/Update Sources and now you should see almost the same. If not check all your settings or post a comment so I'll be able to help you.


  5. Again you have to change your Java JRE settings to a higher source-level than 1.4 because of Junit version 4. Right click your project, chose Properties and then select another JRE. Then you have to change your source-level by writing the following in to you build-section of your project's pom.xml


  6. Now you have to invoke maven's install-plugin by executing the command: mvn install. Maven will then download all necessary plugins e.g. junit-4.0.jar, etc.

  7. After writing a simple JUnit 4 Test you'll be able to run the test within Eclipse by right clicking the test => "Run As/JUnit Test". After you invoked this command Eclipse opens the JUnit-View and you should see something like this:


  8. Now, I tried to run the test via M2 Eclipse Plugin but the build failed. Have a look at the output, you'll see the error-log and maybe it makes sense to you but I don't have any ideas why the tests fail. If you invoke the same command (mvn test) over the command-line everything works fine so it seems to me that the M2 Plugin is Buggy.


Maybe, if you have a solution you can post it, I'd be very thankful.
Have fun coding with maven and JUnit with your favourite IDE.

Cheers

Thursday, June 28, 2007

Debugging Custom Maven Plugins

What you need:

How to:

Code Snippets and Todos for debbuging:

  1. Write a custom Maven Plugin! (@see code snippet 1)
  2. Write a Maven Project which uses your maven-plugin (@see code snippet 2)
  3. Install everything in your local maven repository (mvn clean install)
  4. Set a breakpoint in your custom maven plugin. (@see code snippet 3)
  5. Open the debug-view in Eclipse (@see pic 1)
  6. Invoke your plugin's sayhi-goal in your maven project via m2eclipse-plugin by configuring it over the external tools settings in Eclipse. (@see pic 2)
  7. Eclipse then will automatically stop where you have set your breakpoint! (@see pic 3)

Code Snippet 1:

Code Snippet 2:

Code Snippet 3:

Pic 1:


Pic 2:

Pic 3:


How cool is this!! Finally, you don't have to System.out.println everything to check your custom maven-plugins' variables. Very, very helpful !!!

Cheers

Tuesday, June 26, 2007

Maven | Resources

Because at work I had to prepare myself for a presentation about the fascinating build-tool Maven I'd like to summarize all resources which I've used to get prepared.

Official Sites


Online Articles and Books

Magazines

  • Eclipse Magazin (Vol. 7 Ausgabe 3 06) - m2
  • Java Magazin (09. 06) - Maven 2

Maven Proxies

IDE Plugins

Blogs

Of course this list will be extended and if you have any good resources on maven which is not my list, you are welcome to leave me a comment with a link to this resource.

Cheers

Friday, June 22, 2007

Maven 2.0.7 | Out now

Here you will find the release notes. In this post I'd like to check the new version of Maven and I'd like to describe all changes in my mother tongue (german) because you'll find the english version of the release notes on the official maven-website. So, lets switch to german:

Release Notes Maven 2.0.7

Verbesserungen

  • TODO

Friday, May 18, 2007

Maven News

There a new maven-websites, blogs and articles:

You really should check those out if you are interested in Maven.

Cheers

Wednesday, May 09, 2007

Artifactory Dependency Viewer

Here are some nice digrams of my bookstore dependencies. Your able to see all direct and all transetive dependencies. You just need to use Artifactory as your Maven-Proxy and then you can get the Dependency Viewer which generates those cind of diagrams. Very nice!

From Misc

And now with all test-dependencies turned on (only junit ;o):


From Misc

You're also able to customize the diagram by dragging the dependencies where you want to have them. You just have to pass the pom-file of the project of which you want the dep-viewer to generate the diagram.

Try it out!

Cheers

Friday, April 27, 2007

Artifactory 1.2.1-rc1 released

Today I changed my Artifactory maven-prox version from 1.2.1-rc0 tp 1.2.1-rc1. Just copy the bin, lib, webapp and artifactory.jar to your existing artifactory application and overwrite it. Then restart your proxy and everything just should work right. To get the actual release-notes please check out the following link.

From Maven


From Maven

Take care

Continuum vs. Derby and how to...

... stop an invoked build on the build-server (Continuum) which seems to run in an endless loop. Yesterday, it was the first time we had a problem with one of our projects on the build-server. After a three hour build one of our core-developer came over to my place and told me to stop the project on Continuum because some of our India-colleagues checked in some bad code which caused an endless loop on the database-side of the application.

So how am I able to stop a running project on Continuum? After a ten minutes search on the web-interface of the build-server my second thought was to restart Continuum but despite of the restart the project still kept building so Continuum some how remebers the state of the project's build. *confused* The next thing I did was to find some threads on Nabble.com of developers who maybe already had the same problem as we had and finally I did.

So, after I have finished reading those threads it was clear that I had to handle this problem by manipulating Continuum's database (Derby). So how am I able to do this when the build-server is on a different machine and I'm not allowed to install any oder software on this machine.

I rememberd the fact that NetBeans had it's cool integrated database-ui, by the way this IDE has also integrated support for Derby-databases, so I tried to connect to my Continuum-database by using NetBeans. First I had to stop Continuum or NetBeans would not allow me to connect to the database. After I had stopped the build-server it finally was possible to connect to the Derby-database over NetBeans. So it was possible to connect with the following connection-string: jdbc:derby :\\server\D$\path\to\derby


But then I had the problem that I didn't know which schema I should use to connect to so I tried out every of it. Another problem was that I couldn't see the tables of the database schema so I had to guess the name of the table. In one of the threads there was a sample select-statement but this was only to change the role of an user.

From Maven

So after a while of studiing those threads I found a log-file and saw that Continuum creates all tables on start up and in this log-output I found some tables and one of it was the PROJECT-table and after a 'select * from SA.PROJECT' I saw all installed projects. A second table was the BUILDRESULT-table. The last entry in this table was the project which caused the problem. So I decided to delete this entry.

From Maven

After restarting Continuum the project wasn't building anymore and then I invoked a 'Build All' and today everything was fine. There is one thing I'd like to mention, in one of a thread that I didn't post was a suggestions to invoke a 'Build All' as solution to stop a project but an answer to this post was that this doesn't work so I'm not sure if my decision to delete the entry from the table was the right solution or the that I invoked the 'Build All'-command over the web-interface of Continuum.

But everything works fine now and maybe this may help you or will give you some ideas if you also run in such kind of problems with the Continuum build-server.

Cheers

Wednesday, April 25, 2007

Maven & Co

Today, I decided to set up myself a reference-environtment with the following technologies and how you have to configure this tools that they work properly together. The following list shows all technologies and their versions I've used to set up this environment:

Reference-Project Bookstore

My plan is to develop an online bookstore just to show how maven works with a small web-app which consists of some submodules. In this first post I'd like to show only the build-configuration settings for this web-app. First I created a file structure where to store all my tools, projects and their settings. I created the following folders:

  • Continuum (my Build-Server)
  • Locals (my local maven-repository)
  • Projects (all my projects)
  • Proxies (all maven-proxies => e.g. Artifactory)
  • SVN (my Suversion-Repository)

The following picture shows the file-structure. I haven't collapse all folders because those are just some configuration-specific folders of the tools.

From Maven

All folders marked green are ander Subversion source-control. After I created this structure I had to create a subversion-repository. You just have to invoke the command 'svnadmin create path/to/your/custom/folder' and then import your structure with 'svn import /path/to/repo/ -m "some message"'. Then you have to checkout the project for the first time with 'svn checkout /path/to/repo'.


If everything works fine you can now set up you Continuum build-server to interact with your subversion-repo. This server will execute a specific maven commands (which you will be able to configure) to a certain time (cron job syntax) so you always will haven an overview of the checked in sources and if the application is clean.


There is one custom configuration you have to do if you would like to use the file-protocoll when you would like to set the path to your project's pom-file. By default the file-protocoll is turned off but you can turn it on by setting the 'allowedScheme'file'allowedScheme' in the application.xml of continuum which you will find in the CONTINUUM_HOME\apps\continuum\conf folder.

From Maven


After changing this property everything should work fine. Now you will be able to set up a maven-proxy which enables you to share your application and other artefacts with more developer.

From Maven

Artifactory is really easy to configure but I'm still a bit confused about some settings. I'm going to write about it in upcoming posts. There is only one thing, if you are behind a proxy you have to configure it in the artifactory.config.xml which you can find in the etc-folder of your Artifactory-installation. The following screenshots show some interesting maven-settings about the scm-Tag (Subversion) and the distributionManagement-Tag which configures the path to the snapshot-repository where you can deploy your snapshot-releases to the Artifactory repositories.


From Maven


From Maven

The last thing is to install a webserver where you can deploy your project-site. I have installed Xampp for this kind of purpose. You just have to confiugre your site-tag within your distributionManagement-Tag and then after invoking the mvn site:site site:deploy command your complete project-site will be generated and transfered to your configured path.

So now you have set up a good infrastructure to develop your application and can concentrate on your application logic. In upoming posts I will begin to design my bookstore-application and try to solve the remaining build-configuration-issues
.

Of course you're welcome to descripe your best-practices with this kind of technologies and I also would like to mention the fact that this is not a complete description but should give you an idea on how to set up a possible way for a building-environment for a Java-based web-application.

Cheers