Because of my bachelor-project I'd like to describe how to configure maven 2.0.7 to execute JUnit 4 tests. I'd like to show three possible ways how to set everything up. First I show some screenshots how to integrate everything in my favourite IDE NetBeans (M9).
I won't show all the preconfigs e.g. how to install all the necessary software you'll need to follow along. Have a look at one of my last posts for those issues. After you have installed Java, NetBeans M9, Maven 2.0.7, all necessary maven-plugins in NetBeans, you will be able to do the following:
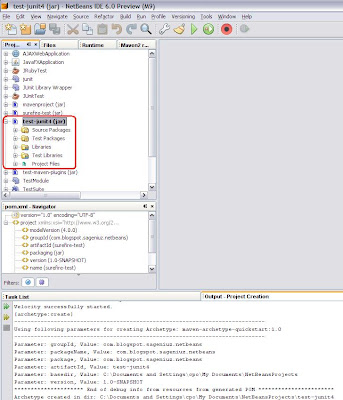
- Create a new Maven Project (File/New Project/Maven/Maven Project/Maven Quickstart Archetype)
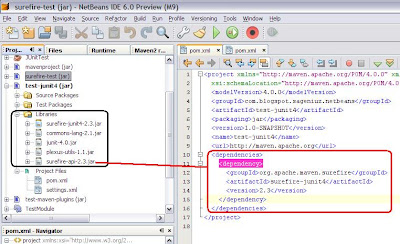
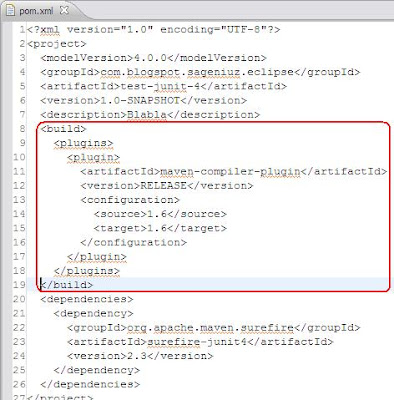
- Change your pom.xml to configure maven to use junit 4 not 3.8.1 by adding the maven-surefire-junit4 and deleting the junit dependency. Maven will automatically download all necessary dependencies, even the transitive ones and because surefire-junit4-2.3 depends on junit-4.0 this jar will also be downloaded.
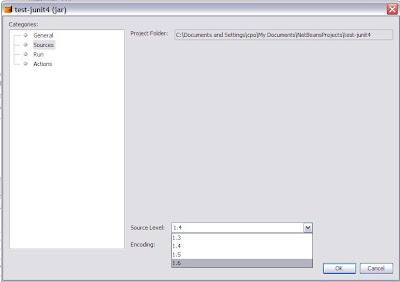
- Change IDE's source-level to a Java-Version greater than 1.4 (in my case 1.6) because JUnit 4 needs it. Right click on your maven-project, got to Sources menu on the left and select your source-level.
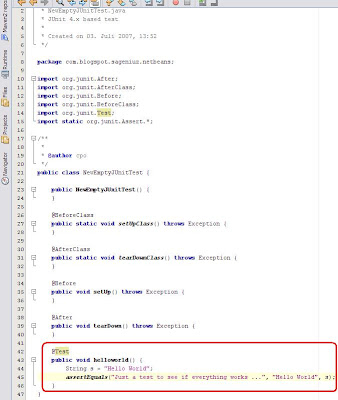
- Lets create a simple JUnit 4 Test by right clicking your test-package, new/Empty Test...

- Create a very simple "helloworld"-Test Method by implementing the following:
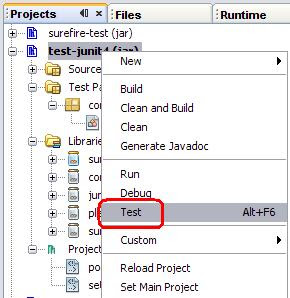
- So lets invoke maven and the surefire-plugin by right clicking your maven-project and Test.
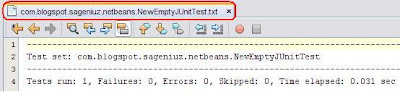
- The following output will be produced. I don't have an idea why we aren't able to see the same output as the output which will be produced by invoking maven over the command-line (by the way: this is another possibility to run JUnit 4 tests) ? Do you have an idea?
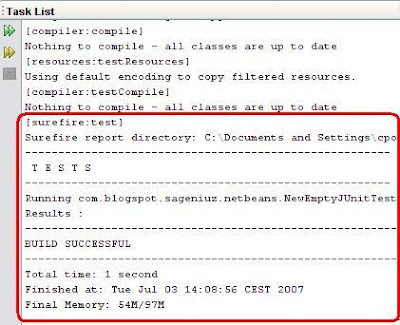
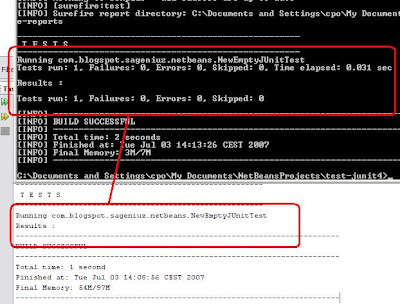
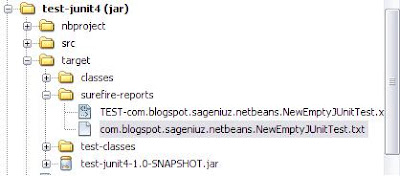
- You can find the same output under the NetBeans-File tab, in the project's target/surefire-reports folder:
So that's it with NetBeans and two of three possible ways how to run maven with Junit 4. No I'd like to show how to configure Maven and Eclipse (by the way: I use the new version of Eclipse ==> Codename: Europa). So here we go...
- First you have to install the M2 Eclipse Plugin: Have a look at my "Debugging Custom Maven Plugins"-How To. There you will find how to install the plugin in the IDE.
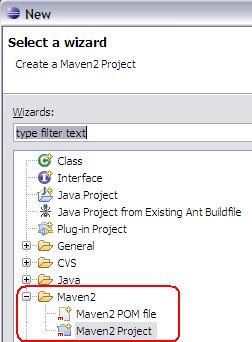
- Then you have to create a Maven Project by cklicking: File/New/Other... and Maven/Maven2 Project.
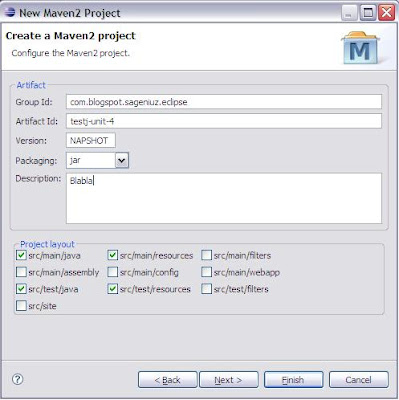
- Configure your project's general settings. First set groupId, artifactId, version etc. then click Next and configure all necessary project-dependencies. Select version 2.3 for the surefire-junit4 plugin.

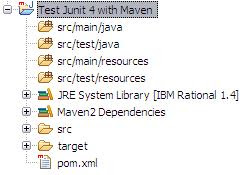
- Now you should see the following or something similar: If not right click your project, Maven/Update Sources and now you should see almost the same. If not check all your settings or post a comment so I'll be able to help you.
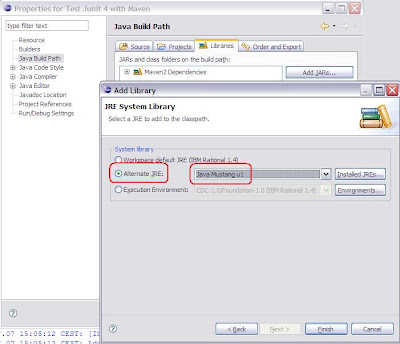
- Again you have to change your Java JRE settings to a higher source-level than 1.4 because of Junit version 4. Right click your project, chose Properties and then select another JRE. Then you have to change your source-level by writing the following in to you build-section of your project's pom.xml
- Now you have to invoke maven's install-plugin by executing the command: mvn install. Maven will then download all necessary plugins e.g. junit-4.0.jar, etc.
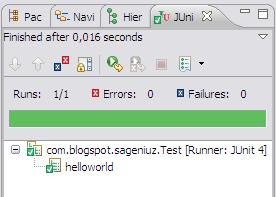
- After writing a simple JUnit 4 Test you'll be able to run the test within Eclipse by right clicking the test => "Run As/JUnit Test". After you invoked this command Eclipse opens the JUnit-View and you should see something like this:

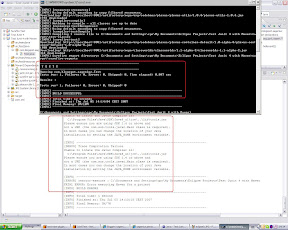
- Now, I tried to run the test via M2 Eclipse Plugin but the build failed. Have a look at the output, you'll see the error-log and maybe it makes sense to you but I don't have any ideas why the tests fail. If you invoke the same command (mvn test) over the command-line everything works fine so it seems to me that the M2 Plugin is Buggy.
Maybe, if you have a solution you can post it, I'd be very thankful.
Have fun coding with maven and JUnit with your favourite IDE.
Cheers
No comments:
Post a Comment